GSA VPN
The BSP environments are only accessible from the GSA VPN.
If you have GSA Furnished Equipment (GFE), we recommend using AnyConnect to access the VPN directly.
Alternatively, Citrix VDI is a virtual desktop provided by GSA. The virtual desktop is a Windows machine on the GSA VPN, allowing access to the BSP environments. The GSA Insite describes how to request access to Citrix.
On the Virtual Desktop, download the following Putty 64 bit executables (found here): putty.exe, pageant.exe, puttygen.exe. Put these executables somewhere conveniently accessible, probably on Desktop.
Copy your private SSH key to the Virtual Desktop (this is the private key paired with the public key you added to GSA/datagov-deploy Ansible vault). You may use the Citrix application tools to copy this file over (located at the top-center of the application).
Next use the Putty keygen tool (PUTTYGEN) to convert your SSH key to PPK format. Double click the file downloaded to start. From the menu, select "Conversions" -> "Import key". Select your the private SSH key. You will be prompted for your SSH passphrase.
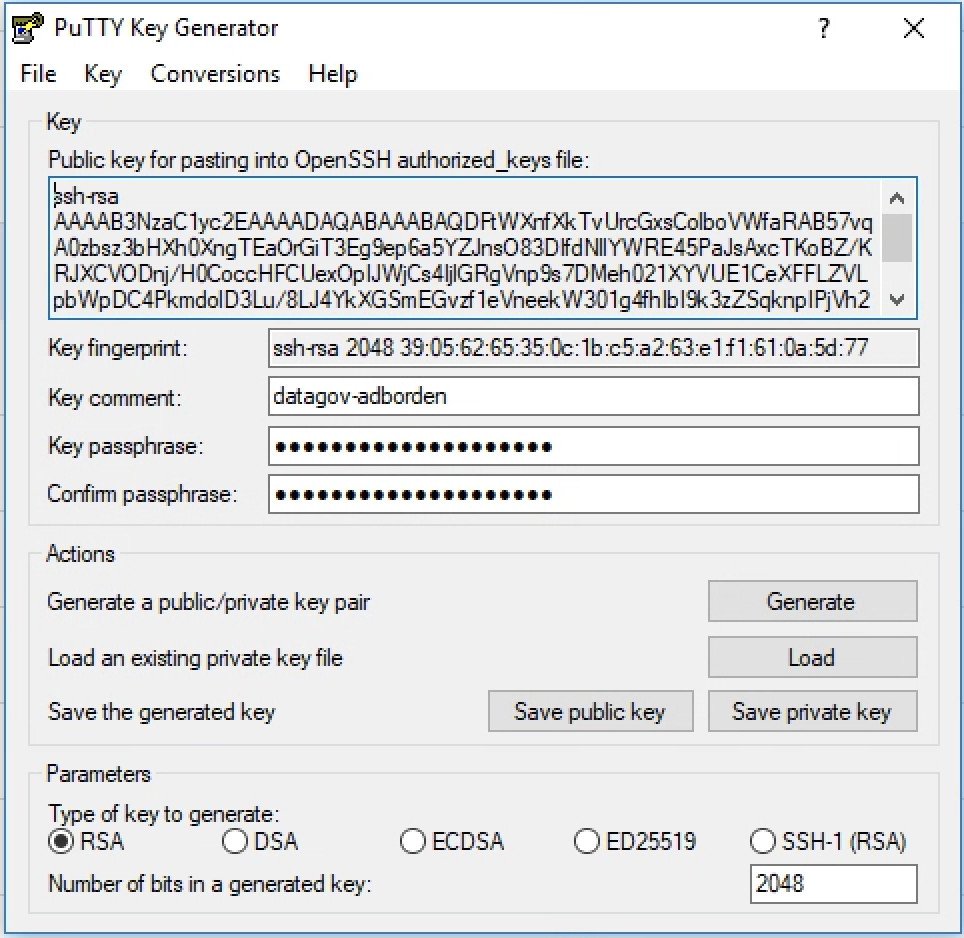
The key fingerprint should match the fingerprint of your private key.
$ ssh-keygen -l -E md5 -f ~/.ssh/id_rsa
2048 MD5:39:05:62:65:35:0c:1b:c5:a2:63:e1:f1:61:0a:5d:77 me@example.com (RSA)
Click "Save private key" to save the converted PPK file.
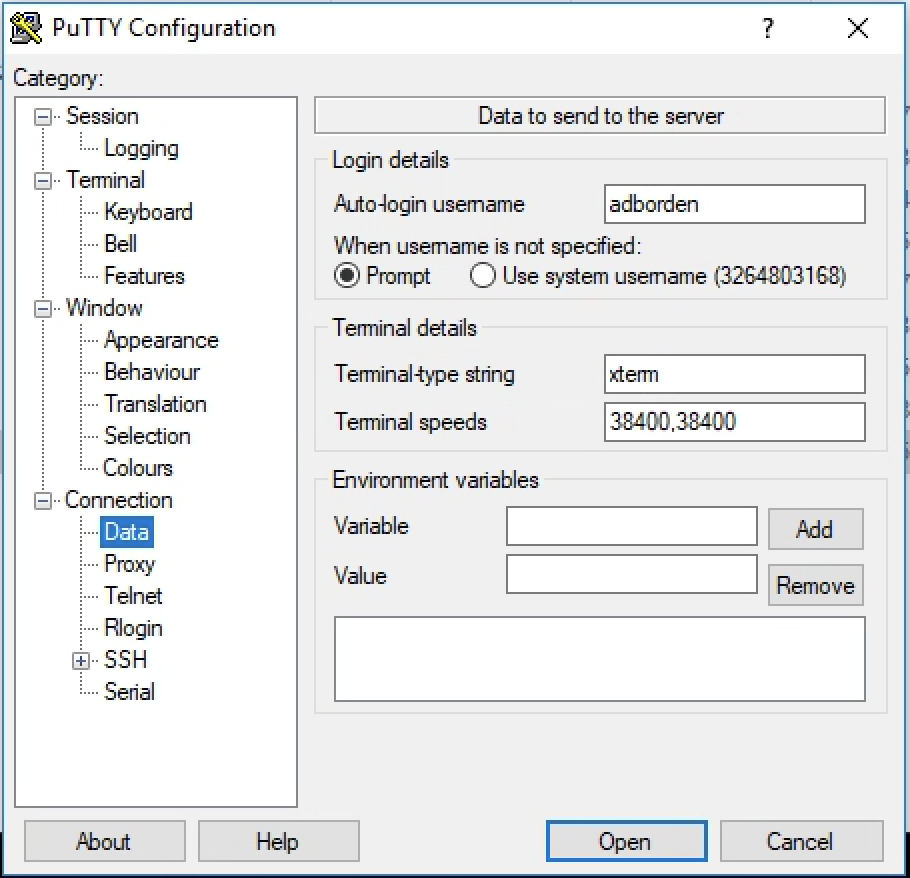
Configure Putty to connect to the jumpbox using your converted SSH key and your username. First, enter the jumpbox host under Host Name (complete list is in the Readme).

Under "Connection" -> "Data", enter your username under auto-login username. This is the same username you added to GSA/datagov-deploy vault.
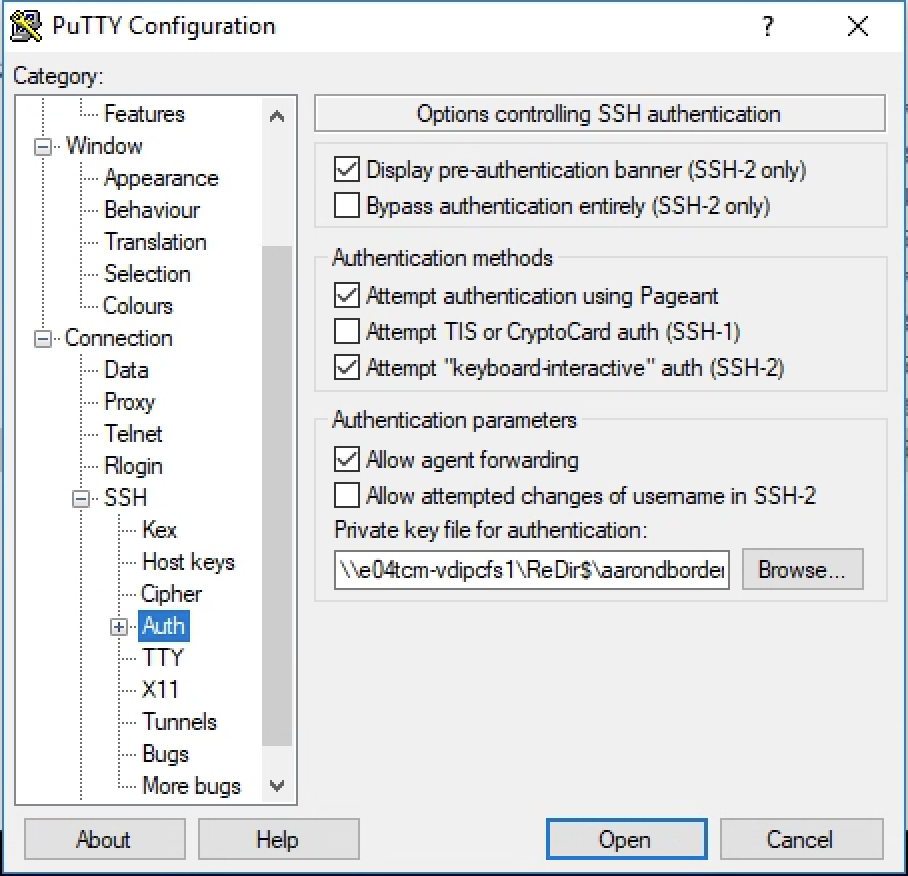
Under "Connection" -> "SSH" -> "Auth", browse for your private SSH key (in PPK format). Also select the Allow agent forwarding box.
Under "Session", enter a name for the session under "Saved Sessions", e.g. Data.gov staging. Then click Save.
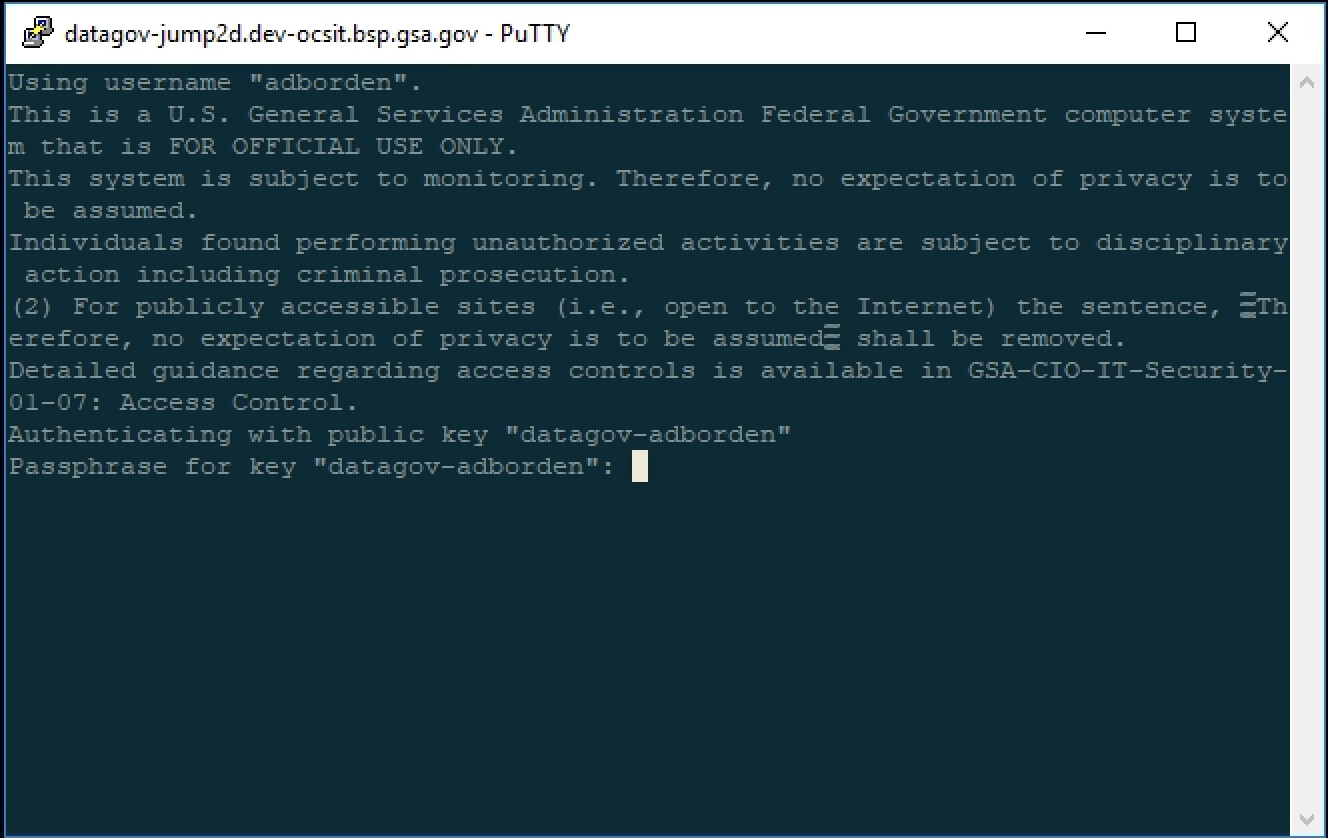
You can repeat these steps for each BSP environment (production and staging). Select a session, then click Load. Then click Open to launch the session. You will be prompted for your SSH key passphrase.
To setup your key to be utilized by Linux in the SSH forwarding, we need to utilize the pageant executable. First start pageant by double clicking on the file that was saved (if it is already started, you will get a notification saying Already Running). Next, go to the System Tray in the bottom right of Windows and find the Pageant Icon. Right click, and select Add Key. Then browse to your private key file and select. The jump box (among others) will now pick up your key and you should be able to access other servers via SSH from the jump box.
Windows keeps PuTTY sessions in its registry. It is lost every time you log off the Windows virtual desktop. Here is the way to save the session data so you don't have to re-enter the data over and over.
-
Setup your putty session with everything you want saved (production and staging).
-
Click on Start and then type cmd to open Command Prompt window, and enter the following command to run.
regedit /e "%USERPROFILE%\datagov-putty.reg" HKEY_CURRENT_USER\Software\Simontatham\PuTTY\Sessions
-
Click Windows File Explorer and type %USERPROFILE% in the address bar. Or equivalently go to folder
C:\Users\[your-user-name]. You will see the filedatagov-putty.regcreated in step 1. Move the file to your Desktop. -
Next time you log into the new virtual desktop session, double click the file
datagov-putty.regon your Desktop, your putty sessions will be auto imported. No more typing.