-
Notifications
You must be signed in to change notification settings - Fork 619
Creating a Guide
Our guides center around specific use cases, and describe the steps that you would take in order to fulfill those use cases. They are broken down by steps and usually can be displayed with embedded information that shows further information about performing that step in a particular language or framework.
Documentation pages are stored as Markdown files in the /packages/@okta/vuepress-site directory.
As an example, lets say you want to edit the Users API page. The public path of this page is /docs/reference/api/users/. To edit this page, you would navigate to /packages/@okta/vuepress-site/docs/reference/api/users/index.md and edit that Markdown file.
An index.md file in a directory like users will be served as /users/ when the site is live. If you name the file anything other than index.md, you will need to include .html in the URL when you view the page in your browser.
For a link to a new Concepts or Reference page to be included in the site's left side navigation bar, you need to edit the file that controls that navigation bar. See Left Side Navigation.
More information about writing content for VuePress can be found in our VuePress Authoring Guidelines. There you will also find our Style Guide.
Every guide is based in a subdirectory under packages/@okta/vuepress-site/docs/guides/. The subdirectory name is used in the url for the guide, so follow best practices for URLs (human-readable, lowercase, no spaces, no special characters other than '-'). For example:
packages/@okta/vuepress-site/docs/guides/name-of-guide/name-of-framework/name-of-section
The docs/guides/index.md file contains the overall meta-data for all the guides in the front matter. This file contains the ordered list of guides offered and the ordered list of "featured" guides for the main Guides page. (TODO: Move content from GuidesOverview to this index.md file) If a guide is not listed in this file, it IS on the site but is NOT linked to.
Each guide directory will have a number of section subdirectories. These are used in the urls for each section of the guide, so follow best practices for URLs in naming these directories. Each guide directory has an index.md file that holds meta-data for the guide, notably the ordered list of section directories. Any section directory not listed can be accessed on the site but will not be linked to. Each section directory has an index.md file that holds the Markdown content for that section. For example: docs/guides/name-of-guide/name-of-section/index.md
If a guide section has framework-specific content, you can use <StackSelector snippet="SNIPPET-NAME"/> where SNIPPET-NAME is a section-specific indicator of your choice. This does NOT appear in a url, but please follow common filename conventions.
Content for the StackSelector snippets are found in docs/guides/NAME-OF-GUIDE/NAME-OF-SECTION/NAME-OF-FRAMEWORK/SNIPPET-NAME.md files.
- Create the guide directory
- Create the guide index.md
- Create a subdirectory for every section
- Put your Markdown content into the
index.mdfile for each section subdirectory - For any snippets you declare, create the
NAME-OF-FRAMEWORK/NAME-OF-SNIPPET.mdfiles in the section subdirectory - Make sure the
index.mdfile for the section includes the title of the section - Make sure the
index.mdfile for the guide includes the title for the guide and the list of all section subdirectories (in order) - Make sure the main guides
index.mdfile lists your guide in the desired position in the order
Many guide sections have one or more areas of framework-specific content. This can be code, instructions, or a mix of the two. When a guide section has a need for such content, there are several types of StackSelector or StackSnippet tags that you can use to display framework-specific text.
The Stack tag is simply added to the index.md content where you want some framework-specific content to appear. Then create the relevant content in NAME-OF-FRAMEWORK/SNIPPET-NAME.md files for every relevant framework.
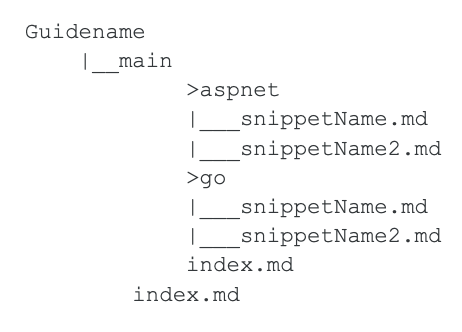
File structure example:

Example stack sections in the index.md file that is within the main folder that also contains the language folders. This index file contains the shared content for the guide.
<StackSelector />
Blah blah block snippet here:
<StackSnippet snippet="snippetName" />
Blah inline snippet is here <StackSnippet snippet="snippetName2" inline /> blah blah blah
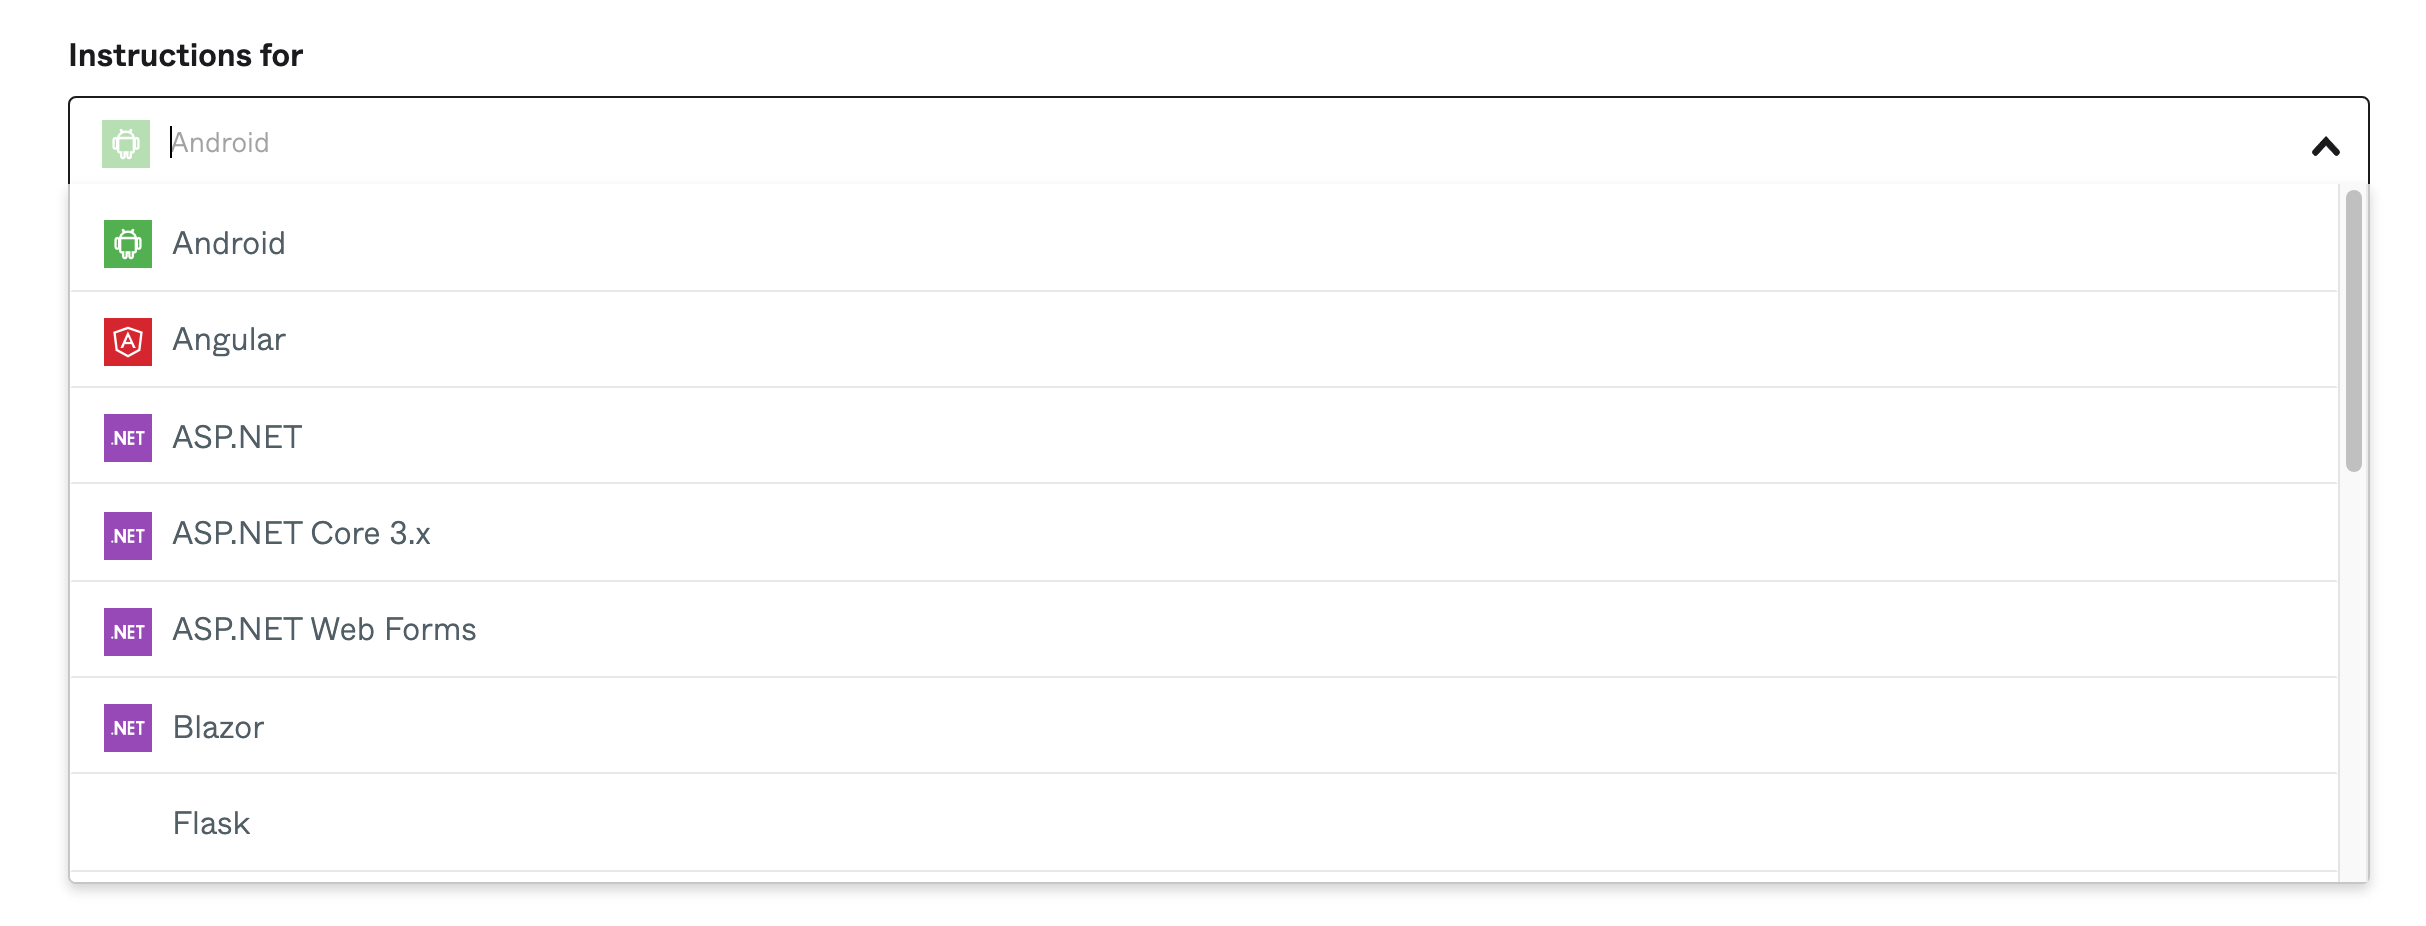
Use the StackSelector tag when you want the Stack Selector drop-down to appear. Use this tag at the top of the index.md page.
The following are the current StackSelector tags:
<StackSelector /> - displays the stack selector with a drop-down.


- AVOID.
<StackSelector snippet="nameofmdfile" noSelector/>: Displays block-level snippet text and no selector drop-down. Use<StackSnippet snippet="nameofsnippet" />instead (see theStackSnippetsection below).
The idea is to no longer use
StackSelectorwithnoSelectororinline, but rather use aStackSnippettag so that it's clear what we're trying to accomplish, which is to display a snippet of text (either block-level or inline), not keep a stack selector drop-down from appearing.
- AVOID.
<StackSelector snippet="nameofmdfile" />: Displays block-level snippet text and a selector drop-down. - AVOID.
<StackSelector snippet="nameofmdfile" inline />: Displays block-level snippet text with a selector drop-down. - AVOID.
<StackSelector snippet="nameofmdfile" noSelector inline />: Displays text inline with no stack selector drop-down. Use<StackSnippet snippet="nameofmdfile" inline />instead. - AVOID.
<StackSelector class="cleaner-selector"/>: There is no CSS for this class. Don't use it. It does the same as<StackSelector />mentioned above.
Use StackSnippet tags when you want to display a snippet of text (either block-level or inline). StackSnippet is StackSelector with noSelector=true.
The following are the current StackSnippet tags:
-
<StackSnippet snippet="nameofmdfile" />- displays block-level text with no block border. -
<StackSnippet snippet="inlineSnippet" inline />- displays inline text.
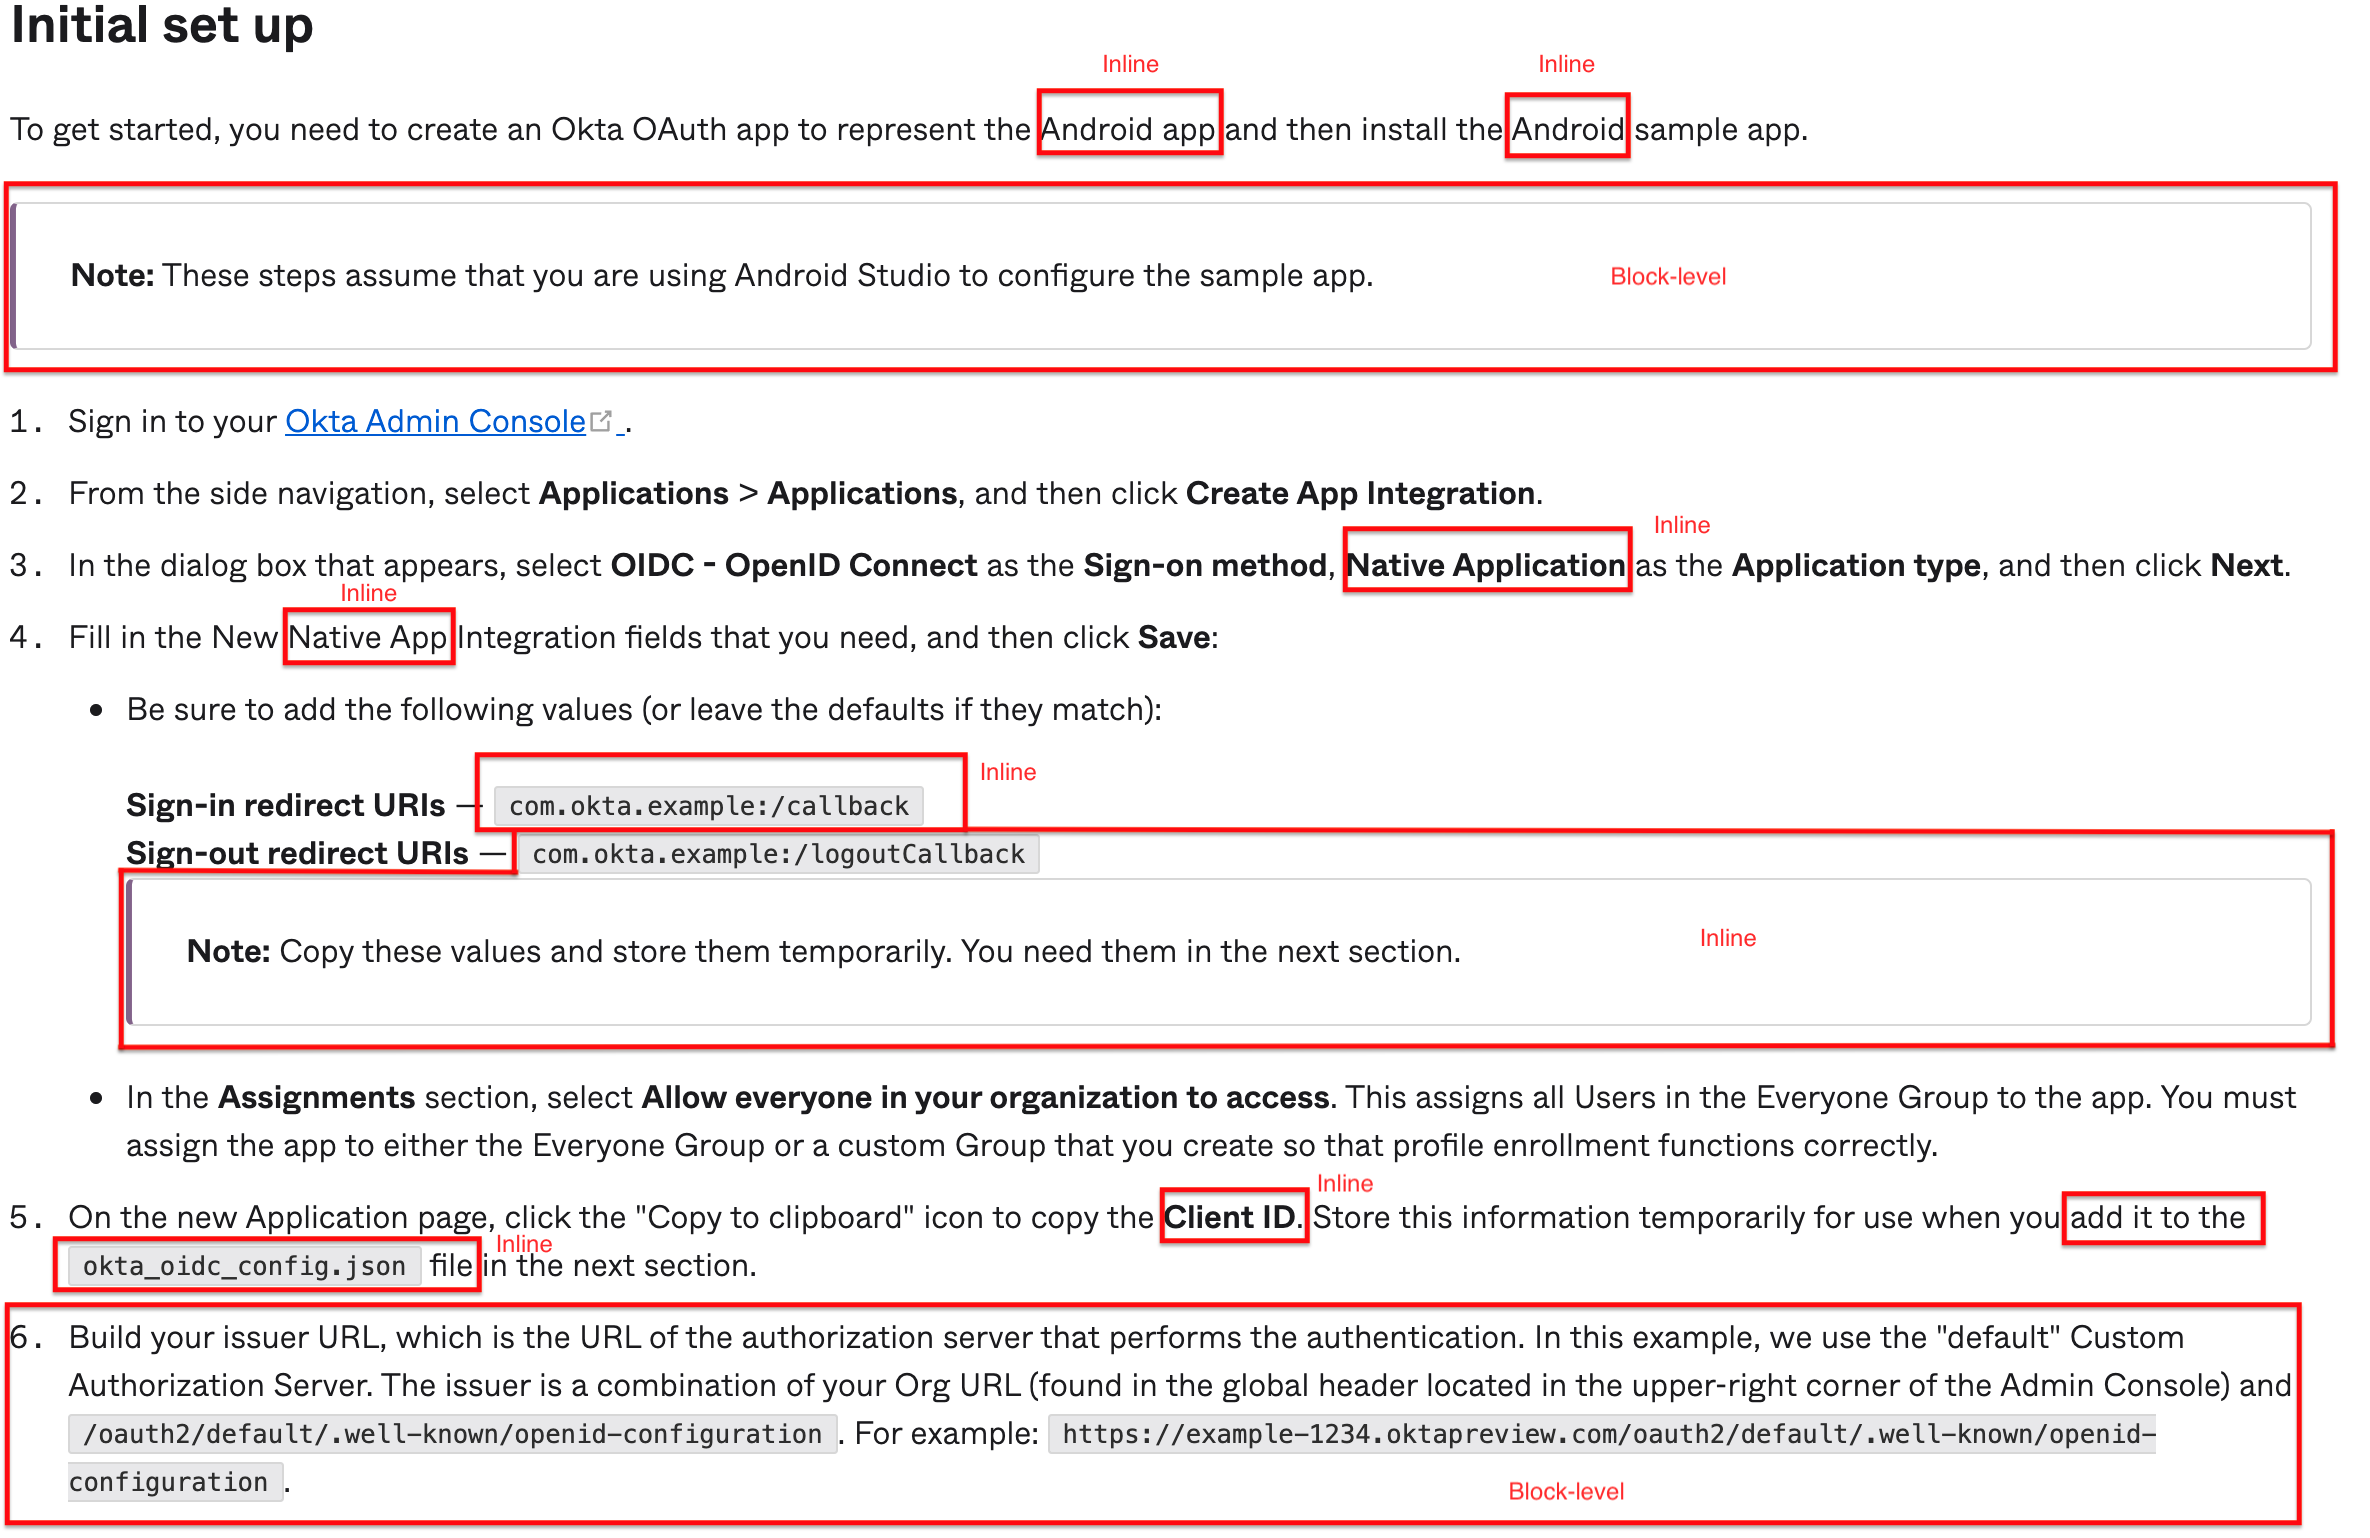
Examples of inline text and block-level text:

The list of selectors doesn’t necessarily have to be frameworks. They could be a list of other categories, such as [Website, CLI] or [Authorization Code, Authorization Code with PKCE, Client Credentials, and so on.].
To add a selector item, go to the following file: /packages/@okta/vuepress-theme-prose/util/frameworks.js
- Edit the
const COMMON_NAME_TO_FANCY_NAMEarray to contain your subfolder name ↔︎ display name mapping.
- Edit the
const COMMON_NAME_TO_ICON_NAMEarray to contain your subfolder name ↔︎ display icon mapping.
Note: Talk to a person from design, such as Alex Dahl, to get an icon created if there isn’t currently an icon that you need.
Each guide should have the same list of frameworks for all StackSelectors in all sections of that guide. However, each individual guide can have a distinct list of frameworks that does not have to be the same as other guides. For example, a mobile guide might have ios, android, and reactnative frameworks, while a front-end web guide might have react, angular, and vue options.
The framework names in the directories should be entered using lower case and without special characters. The list of frameworks supported with icons and human-readable names are:
- android
- ios
- reactnative
- xamarin
- angular
- preact
- react
- vue
- go
- node
- java
- php
- python
- spring
- dotnet
- dotnetcore
- aspnet
- aspnetcore
The theme and plugins are in separate packages from content. All of the theme files live in /packages/@okta/vuepress-theme-default. See that package's readme for more info.