Author: Stefan.Hundhammer@gmx.de
License: GNU Free Documentation License
sudo apt-get install vim ssh aptitude synaptic muon
sudo apt-get install zsh mmv emacs gnuserv
sudo apt-get install exif exiftran exiftags jhead id3v2
sudo apt-get install vlc mplayer
sudo apt-get install git gitk colordiff automake cmake
sudo update-alternatives --config editor
sudo visudo
Add line (at the end of the file - AFTER any 'include') with:
myusername ALL=(ALL) NOPASSWD: ALL
sudo visudo
Add a line
Defaults !syslog
sudo visudo
Locate the line with env_reset
Defaults !env_reset
sudo passwd root
sudo vi /etc/ssh/ssh_config
Locate the Host * section and add:
PermitRootLogin yes
sudo dpkg-reconfigure keyboard-configuration
Hit [Return] 5 times until the "enable Ctrl-Alt-Backspace" dialog appears.
Whoever came up with the brain-dead idea to force this to "on" should be shot!
sudo apt-get remove numlockx
Maybe fsck.reiserfs missing
sudo apt-get install reiserfsprogs
sudo dpkg-reconfigure --force lightdm
sudo service lightdm restart
(config: /etc/lightdm/lightdm.conf)
sudo update-alternatives --config default.plymouth
sudo update-alternatives --config text.plymouth
sudo update-initramfs -u -k all
http://wiki.ubuntuusers.de/Plymouth
sudo vi /etc/default/grub
change GRUB_CMDLINE_LINUX_DEFAULT="quiet splash"
to GRUB_CMDLINE_LINUX_DEFAULT=""
sudo update-grub
sudo vi /etc/default/grub

GRUB_GFXPAYLOAD_LINUX=1600x900

sudo update-grub
If that doesn't work:
sudo vi /etc/grub.d/00_header
locate the line with
set gfxmode=${GRUB_GFXMODE}
and add a new line with
set gfxpayload=keep
Reference:
- http://askubuntu.com/questions/127851/change-boot-screen-resolution
- http://www.ubuntu-forum.de/artikel/48665/auflösung-der-konsole-ändern.html
sudo vi /etc/default/grub

GRUB_GFXPAYLOAD_LINUX=1920x1200
GRUB_CMDLINE_LINUX_DEFAULT="quiet splash nomodeset \
  video=uvesafb:mode_option=1920x1200-24,mtrr=3,scroll=ywrap"

sudo update-grub
sudo update-initramfs -u -k all
sudo dpkg-reconfigure console-setup
For 1600x900, use "Terminus Bold" in 20x10. Otherwise, "Fixed" (the standard VGA font) is a good choice.
sudo grub-mkfont -s 24 -o /boot/grub/deja.pf2 \
  /usr/share/fonts/truetype/dejavu/DejaVuSansMono.ttf
Add that font to /etc/grub.d/00_header:
sudo vi /etc/grub.d/00_header

GRUB_FONT=/boot/grub/deja.pf2
Build complete grub.cfg from all the snippets in /etc/grub.d:
sudo grub-mkconfig -o /boot/grub/grub.cfg
https://www.kernel.org/doc/Documentation/power/basic-pm-debugging.txt http://wiki.ubuntuusers.de/pm-utils
Sony Vaio VGX-TP1E: Use method 'shutdown'.
Add to /etc/rc.local:
echo shutdown >/sys/power/disk
cd /etc/systemd
sudo vi system.conf
Uncomment and change
DefaultTimeoutStopSec=10s
?? The same values are also in user.conf; maybe change them there as well.
See also
https://unix.stackexchange.com/questions/227017/how-to-change-systemd-service-timeout-value
Add this to ~/.zshrc:
bindkey -s "^[OM" "^M"
How to find out the key codes:
In zsh, hit Ctrl-V and then they key.
Just for this session:
su
echo 1 >/proc/sys/kernel/sysrq
Permanently: Create a new file /etc/sysctl.d/90-sysrq.conf :
cd /etc/sysctl.d
sudo vi 90-sysrq.conf
Add this line:
kernel.sysrq=1
-
Alt SysRqR(raw) Switch keyboard from raw mode, i.e. take it away from the X server. This will switch to a text console. Switch back to X withAltF7. -
Alt SysRqSSync all mounted filesystems. -
Alt SysRqBReboot -
Alt SysRqSpaceShow a summary of SysRq keys -
Alt SysRqREISUB"Gentle" reboot:R: Switch keyboard from raw modeE: Send SIGTERM to all processes except initI: Send SIGKILL to all processes except initS: Sync all mounted filesystemsU: Remount all mounted filesystems in read-only modeB: Reboot
See also https://en.wikipedia.org/wiki/Magic_SysRq_key
Use Fn S + command-key
or Ctrl Fn S + command-key
Hit Ctrl Esc to show the sub-processes (including extensions) in Chrome-based
browsers including CPU and memory usage. You can kill individual ones from
there.
Create ~/.xprofile with
USRRESOURCES=$HOME/.Xdefaults
(yes, USRRESOURCES, not USERRESOURCES)
vi ~/.config/user-dir.dirs
Install "qt5ct", set the environment up to use it and set fonts with it:
sudo apt-get install qt5ct
export QT_QPA_PLATFORMTHEME=qt5ct
qt5ct
Restart any running Qt 5.x programs so they are using that environment variable. They should even change their settings on the fly when you hit the "apply" button in qt5ct.
cat noscreensaver
#!/bin/sh
xset -dpms s off s noblank s noexpose
Add this to Autostart (Xfce: settings -> session -> autostart)
sudo apt-get install solaar
sudo apt-get install xdotool
map key to
xdotool click 2
in XFce: Map Windows key (Super_L)
(Seen on Xubuntu 20.04 LTS with kernel 5.4.0-48 and nvidia-driver-450)
Check the syslog for this message: NVRM: GPU ...: GPU has fallen off the bus.
sudo journalctl | grep "fallen off the bus"

Okt 06 17:59:27 balrog kernel: NVRM: Xid (PCI:0000:01:00): 79, pid=1122, GPU has fallen off the bus.
Okt 06 17:59:27 balrog kernel: NVRM: GPU 0000:01:00.0: GPU has fallen off the bus.
Try setting persistent mode for the GPU. Check the current persistent status:
nvidia-smi

+-----------------------------------------------------------------------------+
| NVIDIA-SMI 450.66       Driver Version: 450.66       CUDA Version: 11.0     |
|-------------------------------+----------------------+----------------------+
| GPU  Name        Persistence-M| Bus-Id        Disp.A | Volatile Uncorr. ECC |
| Fan  Temp  Perf  Pwr:Usage/Cap|         Memory-Usage | GPU-Util  Compute M. |
|                               |                      |               MIG M. |
|===============================+======================+======================|
|   0  GeForce GTX 105...  Off  | 00000000:01:00.0  On |                  N/A |
                           ^^^
                           |||
Set it once (this won't survive a reboot):
sudo nvidia-smi -pm 1
To make this permanent so it survives reboots, put it into a systemd unit in
/usr/local.
-
Create the directory and add a new systemd unit file there:
sudo mkdir -p /usr/local/lib/systemd/system
cd /usr/local/lib/systemd/system
sudo vi my-nvidia-persistent.service
With this content:
[Unit] Description=Set NVidia GPU to persistent mode Requires=nvidia-persistenced.service StopWhenUnneeded=true [Service] Type=oneshot ExecStart=/usr/bin/nvidia-smi -pm 1 [Install] WantedBy=default.target -
Check if systemd finds it:
systemctl list-unit-files "*my*nvidia*" -
If not, notify systemd to re-read the units:
sudo systemctl daemon-reload -
Start it only once (won't auto-start after reboot with this method):
sudo systemctl start my-nvidia-persistent -
Check if it was successful:
sudo systemctl status my-nvidia-persistent nvidia-smi -
Enable it for future reboots:
sudo systemctl enable my-nvidia-persistentYou should now have a symlink
/etc/systemd/system/default.target.wants/my-nvidia-persistent.serviceto/usr/local/lib/systemd/system/my-nvidia-persistent.service. -
Reboot and after the reboot check the persistent status:
sudo reboot -
After reboot:
nvidia-smi
cd /usr/share/X11/xorg.conf.d
Create file 20-intel.conf:
Section "Device"
    Identifier "Intel Graphics"
    Driver "intel"
    Option "AccelMethod" "SNA"
    Option "TearFree"    "True"
EndSection
Restart X11 (Ctrl-Alt-Backspace)
Check in Xorg.log:
grep -i TearFree /var/log/Xorg.0.log

[  8758.350] (**) intel(0): Option "TearFree" "True"
[  8758.354] (**) intel(0): TearFree enabled
Install PCManFM:
sudo apt install pcmanfm
Install a thumbnailer for those files.
Check /usr/share/thumbnailers what MIME types are already supported:
grep MimeType /usr/share/thumbnailers/*
If there is none for videos, install ffmpegthumbnailer:
sudo apt install ffmpegthumbnailer
Restart it from a shell:
xfce4-panel -r
in ~/.local/share/akonadi/db_data/ib_logfile*:
akonadictl stop
sudo vi /etc/akonadi/mysql-global.conf
Search for
innodb_log_file_size=64M
Replace with
innodb_log_file_size=1M
then
akonadictl start
sudo apt-get remove --purge apparmor
akonadictl stop
rm -rf ~/.config/akonadi
akonadictl start
sudo apt-get install imagemagick

cd /usr/share/gwenview/images
sudo mv background.png background-bullshit.png
sudo convert -size 256x256 xc:black black-background.png
sudo ln -s black-background.png background.png
Using a symlink prevents the created black background from being overwritten upon the next package update of Gwenview: It will just clobber the symlink which can easily be restored.
dpkg -l | grep '^ii'
apt list --installed
dpkg-query --show -f '${Package} ${db:Status-Want}\n' | grep install
with pattern:
dpkg-query -f '${Package} ${db:Status-Want}\n' --show "*xfce4*" | grep install | sed -e 's/ install//'
(see man dpkg-query and then search showformat for more variables)
dpkg -S /some/file/name
with pattern:
dpkg -S "*Qt*"
- Start
muon - Settings -> software sources
- Select mirror "other"
- "Find fastest mirror"
sudo rm /var/lib/update-notifier/updates-available
sudo rm /var/run/reboot-required
sudo rm /var/lib/update-notifier/user.d/data-downloads-failed-permanently
sudo apt-mark hold <pkg>
Later:
sudo apt-mark unhold <pkg>
Show:
sudo apt-mark showhold
sudo apt-cache policy <pkg-name>
aptitude search '?installed ?not(?automatic)' --disable-columns -F '%p' | \
sort \
>/tmp/aptitude-manual-pkg.txt
Remove those from the installation media manifest (that were part of the default installation): Insert the installation USB stick / CD-ROM and:
find /media/.../...ubuntu...  -name "*manifest*"
cd <that directory>

awk '{ print $1 }' filesystem.manifest | \
sed -e 's/:amd64//' | \
sort \
>/tmp/manifest-pkg.txt

comm -13 /tmp/manifest-pkg.txt /tmp/aptitude-manual-pkg.txt
http://www.ubuntuupdates.org/ppa/opera
wget -O - http://deb.opera.com/archive.key | sudo apt-key add -
Check /etc/apt/sources.list.d for duplicates!
-
Un-blacklist
pcspkrfrom/etc/modprobe.d/blacklist.conf -
Start
alsamixerin terminal- Move right to column 'beep'
- Un-mute the channel ('m')
- Turn channel volume up (~2-5%)
sudo vi /etc/X11/xorg.conf

Section "Device"
    ...
    Option "RegistryDwords" "EnableBrightnessControl=1"
EndSection
or create a file in /usr/share/X11/xorg.conf.d, e.g.
12-nvidia-brightness.conf:
Section "Device"
    Identifier  "Default Device"
    Driver      "nvidia"
    Option      "RegistryDwords" "EnableBrightnessControl=1"
EndSection
The section must have an Identifier line.
Restart X11: Ctrl-Alt-Backspace, if enabled, otherwise log out and in, or
service lightdm restart
(Kubuntu also uses LightDM!)
If there is no /etc/X11/xorg.conf, nvidia-settings can create one.
Manual check if it worked:
su
echo 15 >/sys/class/backlight/acpi_video0/brightness
echo 3  >/sys/class/backlight/acpi_video0/brightness
(values 0..15 are accepted)
If that doesn't work:
sudo vi /etc/default/grub

  GRUB_CMDLINE_LINUX_DEFAULT="quiet splash ...  acpi_backlight=vendor"

sudo update-grub
sudo reboot
https://wiki.ubuntu.com/SecurityTeam/KnowledgeBase/SpectreAndMeltdown/MitigationControls https://askubuntu.com/questions/991874/how-to-disable-page-table-isolation-to-regain-performance-lost-due-to-intel-cpu https://www.kernel.org/doc/html/latest/admin-guide/hw-vuln/mds.html
Disable all (CAUTION!):
sudo vi /etc/default/grub

  GRUB_CMDLINE_LINUX_DEFAULT="... pti=off spectre_v2=off mds=off"

sudo update-grub
sudo reboot
** (emacs:6834): WARNING **: Couldn't register with accessibility bus: Did not
   receive a reply. Possible causes include: the remote application did not
   send a reply, the message bus security policy blocked the reply, the reply
   timeout expired, or the network connection was broken.
Fix:
export NO_AT_BRIDGE=1
ibus stole that key. Remove that keybinding from ibus so it is available again for Emacs:
ibus-setup
(as normal user, not as root!)
Tab "General", "Next input method"; click on "...", then "Delete".
Nobody needs that bullshit!
What fucking moron came up with such a brain-dead idea?
Seriously: It is already hard enough to advocate a Linux desktop in the sorry state it's in. We surely don't need anybody fucking around with it every couple of weeks to make it even harder to use. And breaking the most basic and single most important key combination of one of the oldest and most widely-used Linux editors like Emacs is adding insult to injury.
This is the "secondary selection", a remnant of the very early days of the X Window System, going back to the early nineties (i.e. the last millenium). This is obsolete and braindead and just a PITA. It was of little use back in the days of xterm, xload and xclock, and it is completely useless in this day and age of KDE, GNOME, Xfce. Why after so many years somebody decided to enable that by default is beyond me; it shows a complete disconnect from the user base.
I have been using Emacs since 1992 or so, and I had never come across this - until two years ago or so. Suddenly, sometimes for seemingly no reason at all, I got blocks of text highlighted in bright yellow, and there was no way to get it back to normal other than restarting Emacs. What a PITA. And for the life of me I could not find out what was going on and how to fix it.
Emacs uses mouse operations in combination with the Meta key for that secondary selection. Normally, window managers tend to eat those key combinations: Alt-drag-mouse-1 for moving windows around, Alt-drag-mouse-3 for resizing them.
I am not sure what other keys also cause this; some genius might have found one of those other completely superfluous keys on the keyboard (some of the Windows keys?) to be "useful" for that, thus breaking my favourite editor.
May he rot in hell forevermore. May a thousand camels crap on his grave.
Anyway, here is how to get rid of it: Add to one of your Emacs startup files
(e.g. ~/.emacs) those lines:
(global-set-key [M-mouse-1]      nil)
(global-set-key [M-drag-mouse-1] nil)
(global-set-key [M-down-mouse-1] nil)
(global-set-key [M-mouse-2]      nil)
(global-set-key [M-mouse-3]      nil)
This simply undefines those completely braindead key combinations.
If you have an .elc counterpart (a byte-compiled version) of that file, don't
forget to byte-compile it (M-x byte-compile-file).
See also
https://emacs.stackexchange.com/questions/8225/clear-secondary-selection-without-using-mouse
Experienced with Xubuntu 18.04 LTS Bionic Beaver
Uninstall apparmor.
sudo apt-get remove --purge apparmor
Reboot to make sure it isn't still active in the running system:
sudo reboot
It took me quite a while to figure that one out. It might just be an apparmor
profile that isn't set up 100% correctly, but seriously, I don't give a
shit. It was yet another denial of service by this "security enhancement"
tool. Why anybody would bother with this piece of shit software is beyond
me; it never did anything for me, only just against me. Good riddance.
fatlabel /dev/sdc1 'MyLabel'
(from package dosfstools)
Alternative:
sudo mlabel -i /dev/sdc1 ::'MYLABEL'
Caution: This forces the label to be uppercase.
https://help.ubuntu.com/community/RestrictedFormats
Don't forget to activate libdvdcss:
sudo /usr/share/doc/libdvdread4/install-css.sh
-
Make sure
ffmpegis installed. -
Convert:
ffmpeg -i myvideo.webm myvideo.mp4
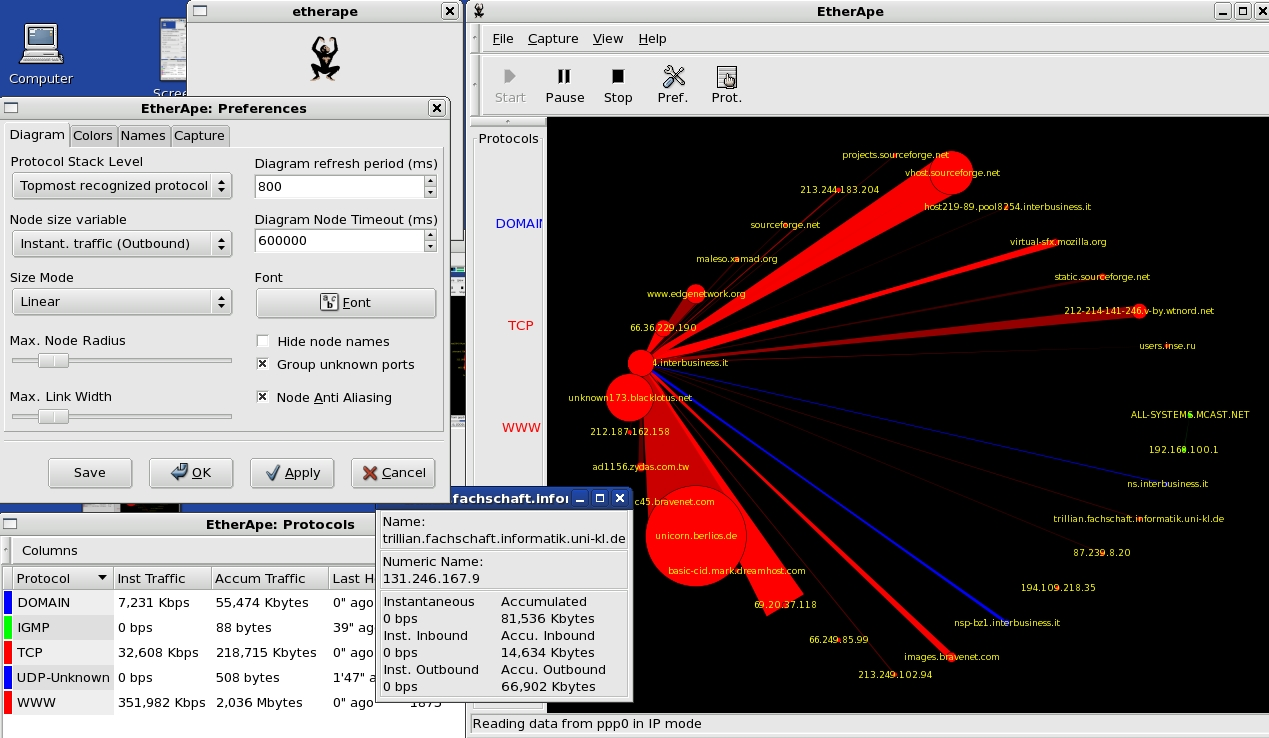
EtherApe is a GUI to show network connections in a graph with a line for each connection that corresponds to the amount of traffic.
Install:
sudo apt-get install etherape
Using:
xhost +
sudo etherape
Install:
sudo apt-get install autofs
Edit auto.master:
sudo vi /etc/auto.master
Add a line for a new map file:
/nas /etc/auto.nas --timeout=180
The first field (/nas)is the parent directory for the mount points,
the second field is the name of the new map file.
--timeout is optional.
Create the new map file:
sudo vi /etc/auto.nas

work  -fstype=nfs,soft,intr  nas:/work
sh    -fstype=nfs,soft,intr  nas:/sh
Each line describes one mount. The first field is the mount point below the
parent directory specified in the master file, i.e. in this example it will
become /nas/work and /nas/sh.
The optional second field are the mount options. The first mount option must
start with a - to identify the field as mount options.
For Nfs4, use
-fstype=nfs4
The last field is the server and the exported mount.
Test:
ls -l /nas/work
This should already mount the NFS directory and show content.
The mount command should also show the new automount map:
mount | grep autofs

/etc/auto.nas on /nas type autofs (rw,relatime,...
Discover mounts on the server (here: nas) with
showmount -e nas
To test what the automounter does, shut it down: Ubuntu 16.04 and later with systemd:
sudo systemctl stop   autofs.service
sudo systemctl status autofs.service
Earlier Ubuntu versions with upstart:
sudo /etc/init.d/autofs stop
Open a new shell and restart the automounter in the foreground (!) with verbose and debug output:
sudo automount -f -v -d
Watch the output while you try to access the NFS mounts in another shell:
ls -l /nas/work
When everything works well, don't forget to restart the automounter: Ubuntu 16.04 and later with systemd:
sudo systemctl start  autofs.service
sudo systemctl status autofs.service
Earlier Ubuntu versions with upstart:
sudo /etc/init.d/autofs start
-
Make sure
cryptsetupis installed:sudo apt install cryptsetup -
Create a large enough file with preallocated size as a container. For a 100 GB file:
cd /target/dir
fallocate -l 100G mycont.dat
alternatively (much slower!) with
dd:sudo dd if=/dev/zero of=mycont.dat bs=1G count=100 -
Create a LUKS encryption layer inside that file:
sudo cryptsetup -y luksFormat mycont.dat -
Open that LUKS container:
sudo cryptsetup luksOpen mycont.dat mysecrets -
Check if there is now a device for it in
/dev/mapper:ls -l /dev/mapperYou should see a symlink
mysecretspointing to../dm-0and a filecontrol.controlis always there. -
Create a filesystem in the container:
sudo mkfs.ext4 /dev/mapper/mysecrets -
Don't reserve too much space in the container for root, consider fsck cycles and give it a volume label.
sudo tune2fs -r 0 -c 0 -L mysecrets /dev/mapper/mysecretsThe volume label is used for the mount point if your desktop (Xfce, KDE, GNOME) automatically mounts it, so choose something that isn't too hard to type.
-
If your desktop doesn't mount it automatically, create a mount point and mount it. A non-obvious name for the mount point might be a good idea to avoid making everybody aware that there is a crypto file;
mkdir /mysecretswould give that away immediately. Use a neutral name for the mount point.sudo mkdir /mnt2 sudo mount /dev/mapper/mysecrets /mysecrets -
Unmount and close it:
sudo umount /mnt2
sudo cryptsetup luksClose mysecrets
-
Unlock:
sudo cryptsetup luksOpen /target/dir/mycont.dat mysecretsDepending on your desktop, it might be automatically mounted, usually to
/media/$USER/mysecrets(the name from the volume label). -
If your desktop doesn't mount it automatically, mount it manually:
sudo mount /dev/mapper/mysecrets /mnt2 -
Unmount and close:
sudo umount /media/$USER/mysecretsor
sudo umount /mnt2In any case, don't forget to close it so it's locked again:
sudo luksClose mysecrets -
Check if it is active:
ls /dev/mapper/mysecretsA file
/dev/mapper/controlis perfectly normal.
See also
man dmsetup
sudo dmsetup ls
sudo blkid | grep LUKS
sudo dmsetup remove_all
This removes the devices only from the DeviceMapper's internal table, of course, it does not actually do anything to the devices.
For many releases, the Opera web browser correctly stored the last main window
size and position in ~/.config/opera/Preferences when closing the last
browser window and restored it when restarting Opera. This file can be edited.
Caveat:
-
Close Opera before doing that as it will be overwritten each time Opera shuts down!
-
It's text, but horribly formatted; it's just one single insanely wide line.
Look for an entry like this:
"window_placement":{"height":1157,"left":230,"maximized":false,"top":0,"width":1520}
There might be several of those. If you edit, make sure to use the right one.
To find a good window size and position, use the xwininfo command from the
x11-utils package.
Right-click the launcher for Opera on your desktop, then click "Edit Launcher" from its context menu. Click into the "Command" field and change it to
opera %U --window-size=1600,1550 --window-position=250,0
Notice the different syntax: It uses a comma as the delimiter, even for the
window size, unlike the X11 standard for -geometry which would be
1600x1550.
If you also have a launcher in the task bar, make sure to edit that as well: Right-click it, select "Properties" from the context menu, then select the bottom-most icon from the buttons on the right side (the "Edit" button with the pencil on the paper), then you get the same "Edit Launcher" window as above; and also edit the "Command" field with the command line above.
In both cases, don't forget to save the changes.
When Opera thinks there is a newer, better, shinier version out there, it will display its "Menu" button in the top left corner red to make it so annoying that you will want to do something about it.
But sometimes they fuck up; sometimes the latest Opera doesn't work, or it
doesn't work with the chromium-codecs-ffmpeg-extra that is available for your
distro. Still, you get that "up yours" red button when Opera wants you to
update.
Start Opera with the --disable-update option; add that to the
command used in the Opera launcher on your desktop.
Check at "Update and Recovery" in Opera's main menu if that had any effect. It should now say "Update check disabled".
cd /usr/lib/x86_64-linux-gnu/opera
sudo mv opera_autoupdate opera_autoupdate.old
Remember that every Opera update or installation will revert this change.
Opera heavily depends on the chromium-codecs-ffmpeg-extra package to display
all video formats. But Chromium (and its codecs) and Opera are not released in
sync; sometimes the Chromium and the codecs are lagging behind, sometimes Opera
is lagging behind. Essentially it has become impossible (since early 2020) to
get matching versions if you rely on automatic updates.
Set both packages on "hold" until you are sure you have matching ones:
- chromium-codecs-ffmpeg-extra
- opera-stable
sudo apt-mark hold chromium-codecs-ffmpeg-extra opera-stable
Use the "About Opera" page from Opera's "Help" menu to find out which Chrome version it is built for; e.g.
Browser identification ...
Chrome/101.0.4951.67 Safari/537.36 OPR/87.0.4390.36_
Do not upgrade Opera if you cannot also upgrade the Chrome codecs to that version: Most YouTube videos will stop playing.
You can use synaptic to see which version you have installed, and which one
is available, i.e. which one you would get with sudo apt upgrade.
When the Chrome major version is increased, you can take your chances: Unhold the packages, upgrade; and remember to set them to "hold" again.
sudo apt-mark unhold chromium-codecs-ffmpeg-extra opera-stable
sudo apt upgrade
sudo apt update
sudo apt-mark hold chromium-codecs-ffmpeg-extra opera-stable
The Opera repos only keep the latest version around. If you want to go back to an earlier version, you are screwed; unless you explicitly download it in time (as long as it's still available) in an archive directory.
[sh @ balrog] .../work/archive/deb 19 % ls -l

total 165244
-rwxr-xr-x 1 sh sh      161 Feb 18 16:11 download-opera-stable
-rw-r--r-- 1 sh sh 84257204 May  9 13:47 opera-stable_86.0.4363.50_amd64.deb
-rw-r--r-- 1 sh sh 84936088 May 27 08:40 opera-stable_87.0.4390.36_amd64.deb

[sh @ balrog] .../work/archive/deb 20 % cat download-opera-stable

#!/bin/sh

DL_DIR=/work/archive/deb

cd $DL_DIR
apt-get download opera-stable

echo "\n$DL_DIR (latest 10):\n"
/bin/ls -rlth opera-stable*.deb | tail -n 10
echo
Call this little script when you think you might have a candidate version for a better Opera; but when you might want to go back to the previous one.
Install a version from this archive directory with dpkg:
sudo dpkg -i ./opera-stable_87.0.4390.36_amd64.deb
This will also handle a version downgrade gracefully.