How to import datasets
In this section you will be able to learn how to import datasets into PACOM. Basically a dataset in PACOM will come for a single input data file that is imported. Then, in the data inspection part of the workflow, individual datasets can be combined and grouped in different levels.
PACOM offers two ways to import a dataset:
One you have launched the tool you will see an image like this one:
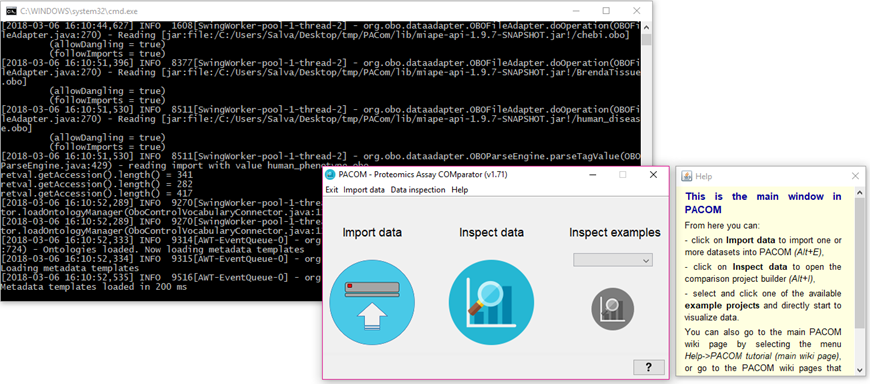
At the same time, PACOM will automatically load some resources needed for running it, which will appear in the black logging window behind. This screen is usefull to check whether the software is doing something or not.
At the right, you will see a Help panel that will be available for many PACOM windows by pressing on the '?' button.
Note: The black logging window behind is usefull in case some error is experienced, so you can take the exception trace from the log on the window and report it to your system administrator or the PACOM developer.
To import datasets into the system, there are two options under the menu 'Import data' :
- Go to import data (ALT+E)
- Go to batch import data (ALT+B)
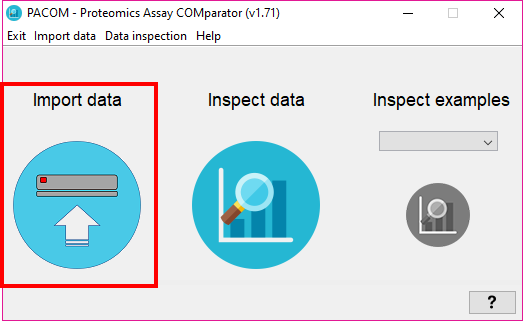
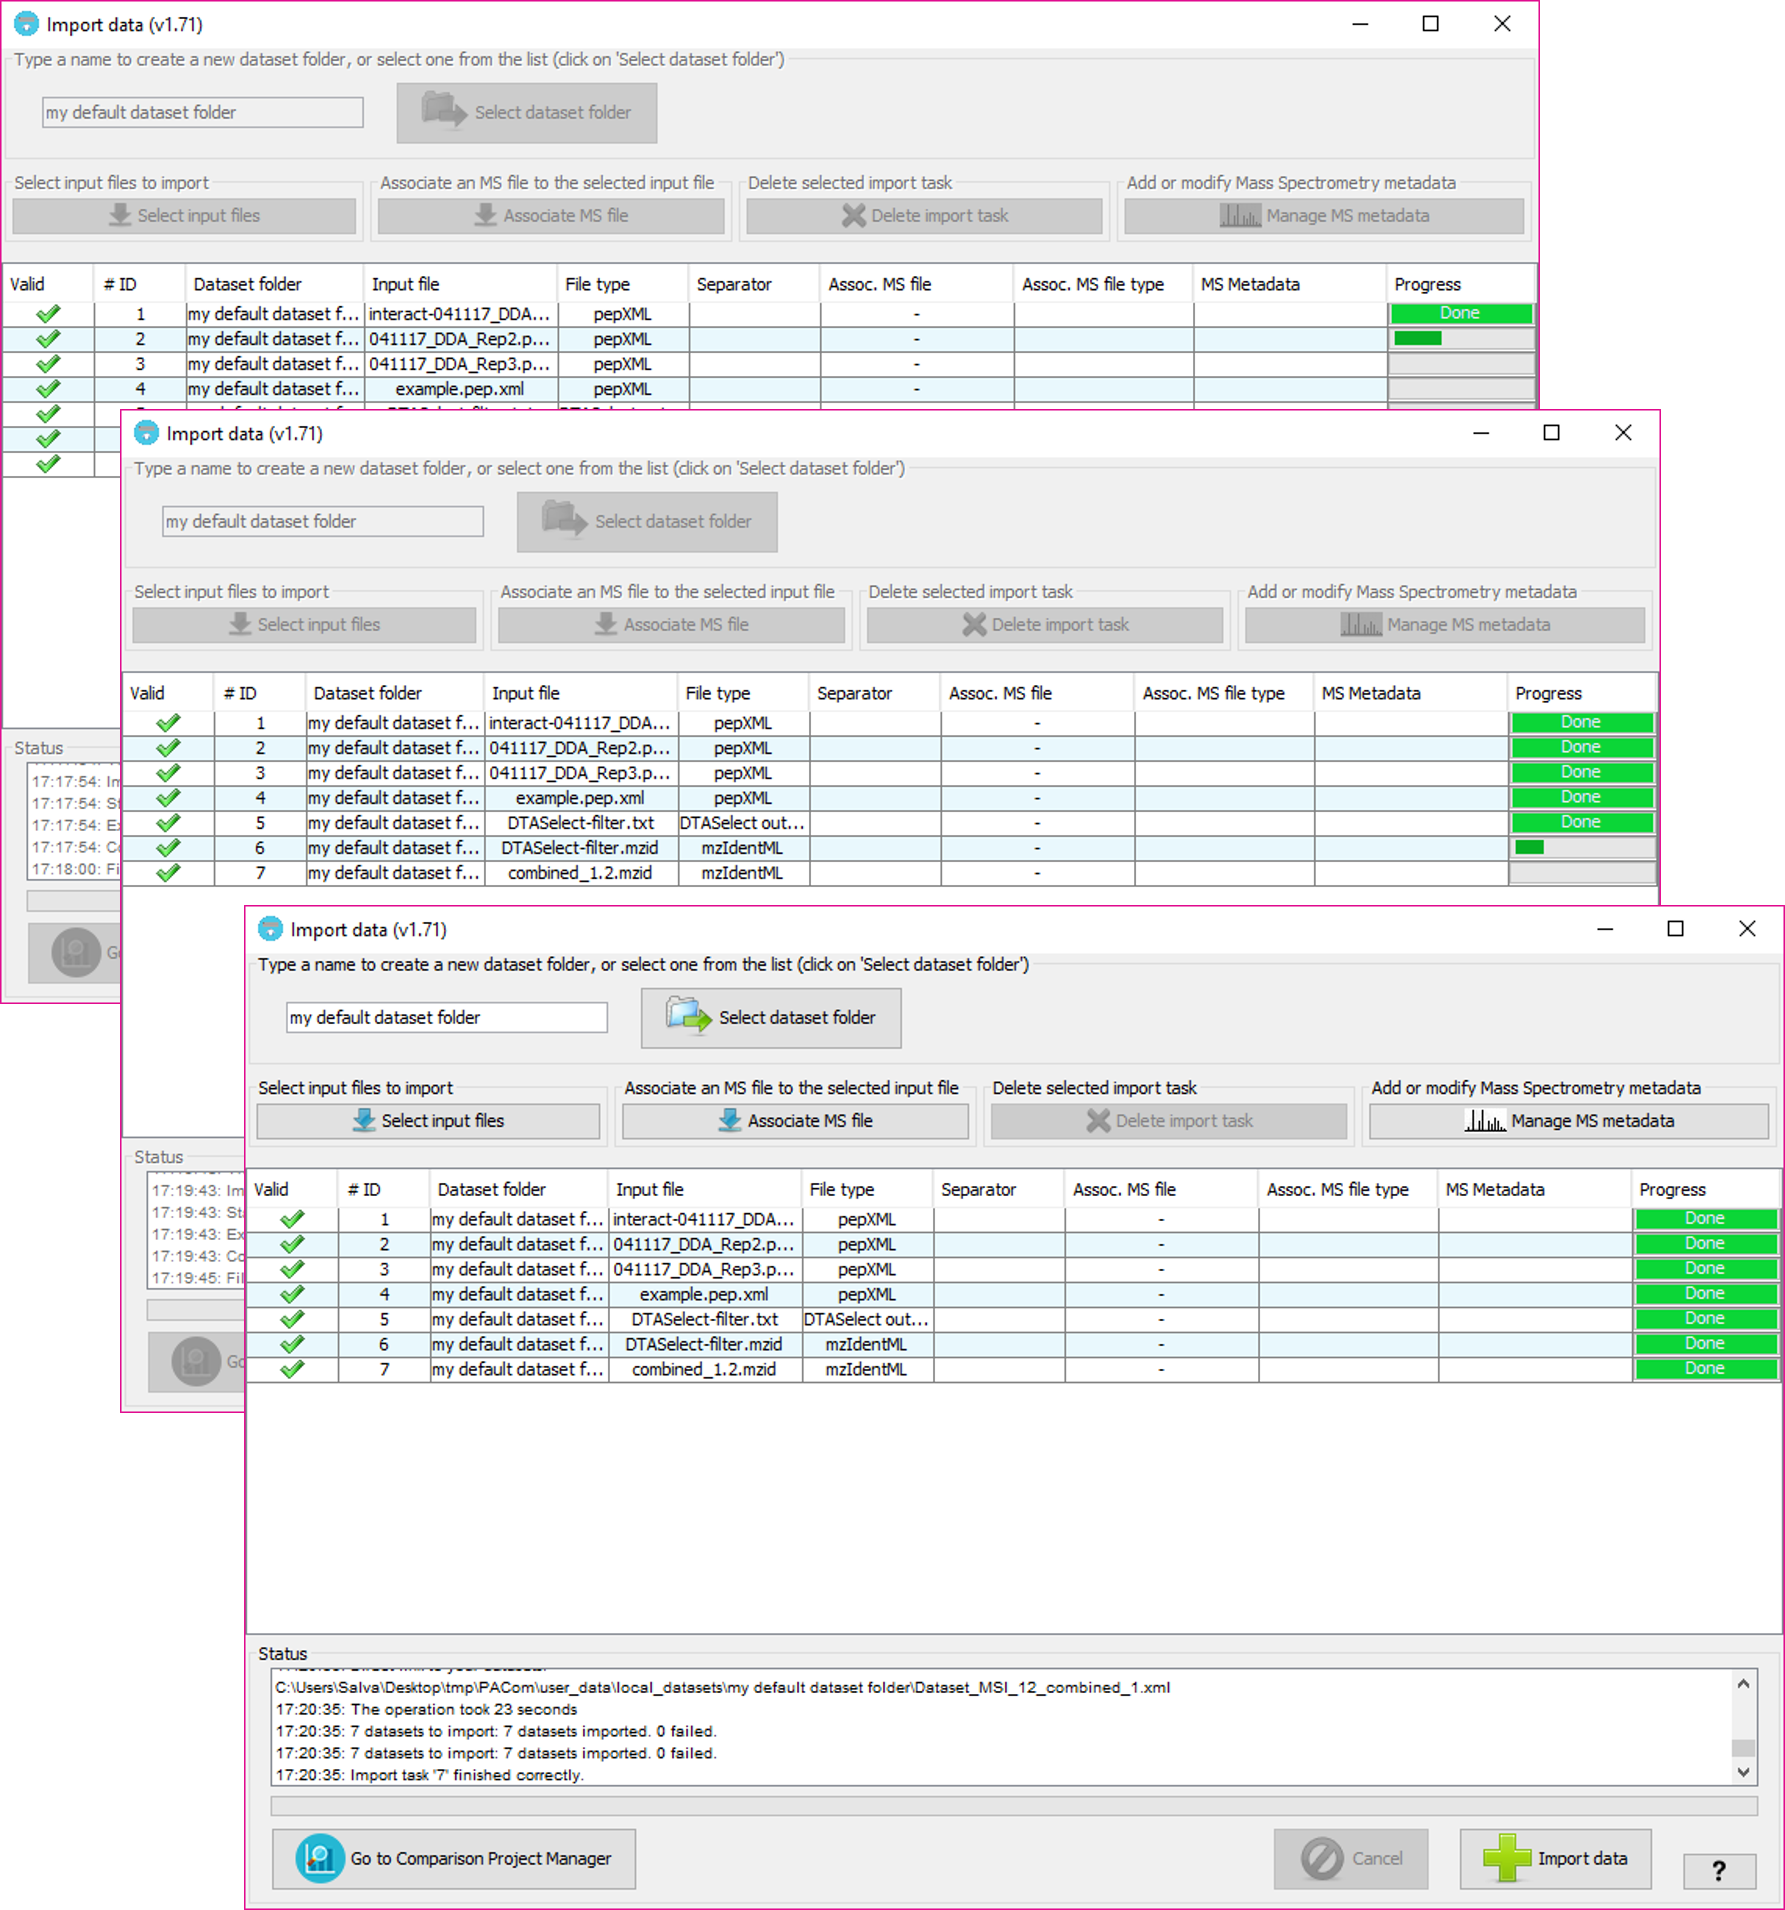
By selecting 'Import data' you will see the following window:
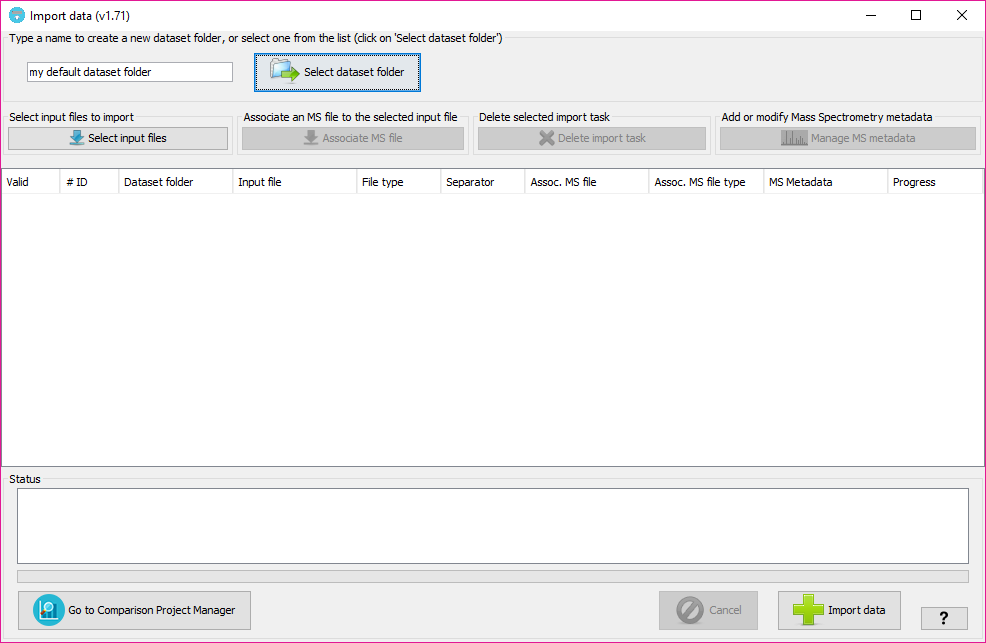
In that window, you will have to:
- mzIdentML: creates a dataset from a mzIdentML file. Both v1.1.0 and v1.2.0 versions of the standard are supported.
- PRIDE XML: creates a dataset from a PRIDE XML file. In this case, you can also create a MS dataset and optionally add additional Mass Spectrometry metadata in the ?Mass Spectrometry metadata? option.
- DTASelect: creates a dataset from the output of the DTASelect software.
- XTandem XML: creates a dataset from the output file of the XTandem search engine.
- pepXML: creates a dataset from the a file with the pepXML which is the most used file format in the Trans Proteomics Pipeline.
-
Table text file: a table in a text file in which the values are separated by a separator (TAB, COMMA, SEMICOLON or COLON). You will have to select the separator from the combobox menu. The input file will have several columns and they can be in any order, but they must have certain predefined headers in order to be recognized. You can click on the interrogation to see the supported headers, but here is the same information:
The following header names are allowed at the first row:
- ACC (mandatory) Column containing protein accessions. Any type of accession is valid, but some features will be only available in case of having UniprotKB accessions. It may contain several accessions in the same cell of the table, as long as they are separated by other type of symbol among: TAB, COMMA, SEMICOLON or COLON (and different than the separator of columns)."
- SEQ: (mandatory) Column containing peptide sequences. They may contain modifications strings inserted in the sequence such as SEQUE(+80.02)NCE.
- PSMID: (optional) Column containing an identifier for the PSM, so that rows with the same PSMID will be referring to the same PSM assigned to a different protein. If not provided, each row in the table will be considered as a new PSM.
- Z: (optional) Column containing the peptide charge state, which should be a positive integer.
- MZ: (optional) Column containing the precursor mass, which should be a real number.
- RT: (optional) Column containing the retention time of the peptide, which should be a real number.
- any other header name: (optional) will be recognized as a new score associated to the PSM, and values in that column should be real numbers. Here the user could insert any value, being a score or not, that want to evaluate looking to its distribution and looking how its value change between datasets for the same peptide.
- Lines starting by '#' will be ignored.
- mzIdentML + mgf: creates a dataset from the mzIdentML file and links the MGF file to it. With this option, the user can then create a complete PRIDE XML file containing the spectra and the identifications as long as it includes some Mass Spectrometry metadata in the ?Mass Spectrometry metadata? option, and as long as the mzIdentML is the result of searching that mgf file.
- mzIdentML + mzML: creates a dataset from the mzIdentML file and links the mzML file to it. With this option, the user can then create a complete PRIDE XML file containing the spectra and the identifications as long as it includes some Mass Spectrometry metadata in the ?Mass Spectrometry metadata? option, and as long as the mzIdentML is the result of searching that mzML file.
- XTandem XML + mgf: creates a dataset from the XTandem XML file and links the MGF file to it. With this option, the user can then create a complete PRIDE XML file containing the spectra and the identifications as long as it includes some Mass Spectrometry metadata in the ?Mass Spectrometry metadata? option, and as long as the XTandem XML is the result of searching that mgf file.
- DTASelect + mgf: creates a dataset from the DTASelect file and links the MGF file to it. With this option, the user can then create a complete PRIDE XML file containing the spectra and the identifications as long as it includes some Mass Spectrometry metadata in the ?Mass Spectrometry metadata? option, and as long as the DTASelect is the result of searching that mgf file.
- pepXML + mgf: creates a dataset from the pepXML file and links the MGF file to it. With this option, the user can then create a complete PRIDE XML file containing the spectra and the identifications as long as it includes some Mass Spectrometry metadata in the ?Mass Spectrometry metadata? option, and as long as the pepXML is the result of searching that mgf file.
- Multi-core processing: to use more than one core available for processing data.
- Non-multi-core processing: just use one single core.
Note: There is no reason for the user to select non-multi-core option unless its computer is extremely busy.
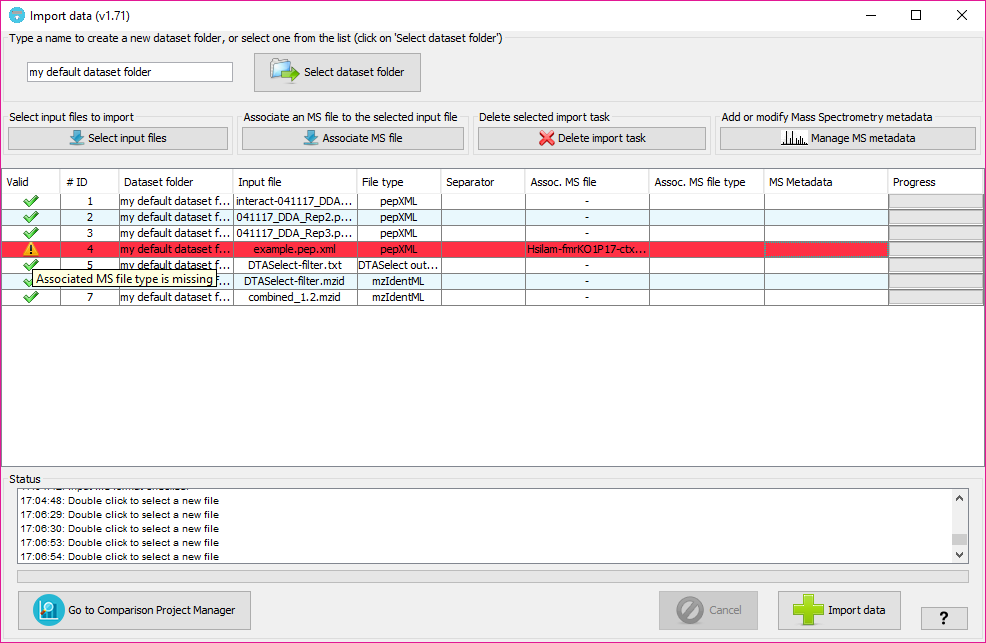
Depending on the Input type option, you will have to select one or two files of certain formats. By changing the input type the name preceding the input file selection text-boxes will change indicating the types of files that are needed.
PACOM will extract the data from the input files and will create some custom XML files that will be stores into a folder inside of the 'user_data\local_datasets\project_name' where 'project_name' is the name of the project given in this window. All datasets created under the same project will be appear under the same folder node when creating the inspection project. It is a way to organize the input datasets.
Note: The actual input data files will be also stored in that folder.
In case of selecting one of the options under the 'Input type + MS data file', that is 'mzIdentML+mgf', 'mzIdentML+mzML', 'XTandem XML + mgf' or 'DTASelect + mgf',

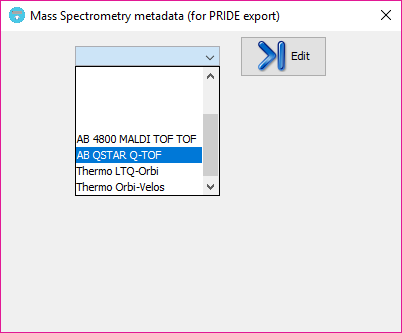
you can add additional mass spectrometry metadata with the mass spectrometry metadata editor. Using it, some Mass Spectrometry metadata can be introduced in a set of forms and can be saved as a template for its use with further datasets. The metadata templates combo box will show any MS metadata information that the user has previously saved (or some example ones that comes by default with PACOM).
In order to edit or create a new template, just click on the ?Edit? button and wait a few seconds to the MS metadata editor to appear:
Once the MS metadata editor is open you will see the different sections of the metadata, based on the MIAPE Mass Spectrometry 1 specifications:
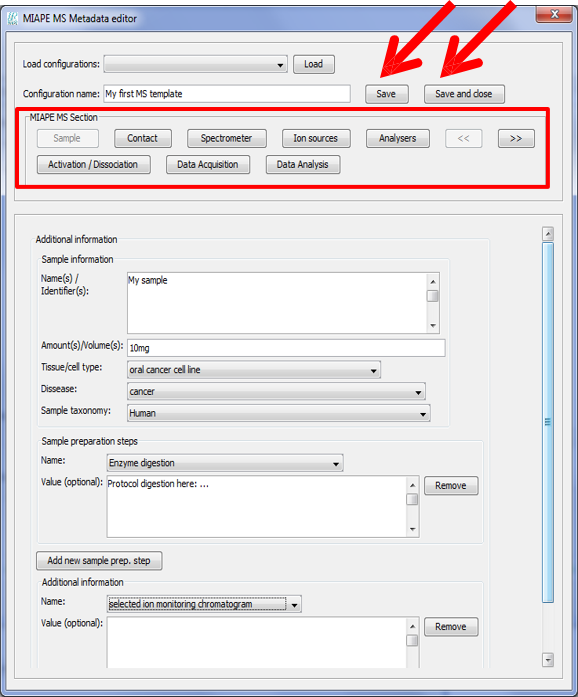
You will be able to jump to any of the metadata sections by clicking on the buttons in 'MIAPE MS Section'.
After filling the information that you want to include, click on 'Save' after assigning a name to the template. Click on 'Save and close' to save the template and close the MS metadata editor.
After closing the MS metadata editor, a new option will be available and already selected on the MS metadata combo box, and a summary of the metadata template will be shown just below:

All MS metadata templates are stored in the system under the 'user_data\ms_metadata_templates' folder. If some information is mandatory for a ProteomeXchange submission is missing, the section will be highlighted with red color as:

Note: That information will be missed in the PRIDE XML that you can generate at the end of the workflow. However, you should take into account that a ProteomeXchange submission using PRIDE XML files into the PRIDE EBI repository is not recommended and you rather be use the standard mzIdentML for that. So, in summary, the tool offers a way to create PRIDE XML files that are MIAPE-compliant, but its use for a ProteomeXchange submission is now deprecated.
Once input files have been selected and target project has been selected or typed (for new ones), the user can run the data import process by clicking on 'Import data' button. If some MS metadata template is selected for the import process, the tool will show a window indicating which MS information will be used. If some information is missing, it will appear on red font (as we explained before).
At the end of the process, if everything went well, the new datasets will be imported and the tool will ask the user if wants to open the new file location with the system explorer:
Note: Depending on the file size, it will take more time to parse it and import it. However it shouldn't be too much.
Batch import mode will allow you to import multiple datasets at once, which is specially useful when having a lot of different experiments and different replicates so you don't want to select the file and click on import for every single dataset.
By selecting 'Batch Import data' you will see the following window:

In that window, you will have to select a batch file. A batch file is a text tab-separated file that defines importing jobs, that will be serially executed.
The batch file is a very simple text file with certain keywords for defining the information that is needed for importing a dataset into PACOM. A full explanation of the syntax of the batch file is also available in PACOM by clicking on the big question mark.
The available keywords are:
- START: Defines the beginning of an importing job. It is followed by a number, as identifier of the job.
- PROJECT: Defines the name of the project in which the dataset will be stored. It is followed by the name of the project. Remember that the project is just a way to organize the imported datasets. A folder with that name will be created under the folder 'user_data/local_datasets/'. This keyword is mandatory per impor job.
- One of the following Input types: MZIDENTML, MZML, DTASELECT, XTANDEM, PRIDE, MGF, followed by the FULL path of the input file. At least one of this keywords is mandatory per impor job.
- METADATA: Defines the name of the MS metadata template to use in the importing job. It is followed by the name of the metadata template. This keyword is optional.
- END: Defines the end of an importing job.
Note: Each keyword is specified in a new line. Note 2: The keywords and the values are separated by a TAB . That is the most common issue that makes a batch import file to not be valid. Since we spaces are allowed in the values, the user MUST use TAB for separating the keyword and the value. Note 3: Any line starting by ' # ' symbol will be ignored.
Simpler example for importing 3 DTASelect files":
START	1
DTASELECT	Z:\path_to_dtaselect
PROJECT	my_project
END

START	2
DTASELECT	Z:\path_to_dtaselect2
PROJECT	my_project
END

START	3
DTASELECT	Z:\path_to_dtaselect3
PROJECT	my_project
END
Example for importing 2 mzIdentML files together with the MGF files used in the search that generated them plus some mass spectrometry metadata previously created as described above:
START	1
MGF	c:\path_to_MGF_1.mgf
MZIDENTML	c:\path_to_mzIdentml_1.mzident.xml
PROJECT	project_name
METADATA	miape_ms_metadata_template_name
END

START	2
MGF	c:\path_to_MGF_2.mgf
MZIDENTML	c:\path_to_mzIdentml_2.mzident.xml
PROJECT	project_name
METADATA	miape_ms_metadata_template_name
END
Once you have your batch import file you can load it in the tool and it will be validated. If everything is ok, you will see a queue of dataset import jobs as:

Then you can start all jobs at once by clicking on 'Start batch import' button or just start the individual jobs you want by clicking on the individual 'start' button. By clicking on 'Start batch import' button, the first importing job in the queue will start:

After finishing it, the second will automatically start.

Until the last job is finished:

Once any job is finished, you will have some buttons to go to the generated datasets files:

Note: the MS dataset button will be only enabled if you created a MS dataset with that job.