V. Additional Tips & Tweaks
Most SD cards that are shipped with the device will come with bios files pre-installed (which is somewhat naughty). Using GmenuNX or MinUI does not change the fact that you will need BIOS files for specific emulators (PSX, Neo Geo, etc.).
| System | BIOS name | Location (MinUI) | Location (GmenuNX) |
|---|---|---|---|
| PlayStation1 |
psxonpsp660.bin, scph101.bin, scph7001.bin, scph5501.bin, scph1001.bin
|
/Emus/PlayStation.pak/bios |
/Apps/pcsx/bios |
| GameBoy Advance2 | gba_bios.bin |
/Emus/GameBoy Advance.pak/ or /Roms/GameBoy Advance/.picogpsp
|
/Apps/picogpsp/ |
| GameBoy Color3 | gbc_bios.bin |
/Roms/GameBoy/.gambatte/bios |
Apps/gambatte/bios |
| Sega Mega CD |
bios_CD_E.bin, bios_CD_J.bin, bios_CD_U.bin
|
/Roms/Genesis/.picodrive |
/Apps/picodrive/ |
| PC Engine CD | syscard3.pce |
/Roms/TurboGrafx-16/.temper/syscards |
/Apps/temper/syscards |
| NEO GEO4 | NEOGEO.zip |
/Roms/NEOGEO/ |
/Apps/gngeo/ or /Roms/NEOGEO/
|
1 - psxonpsp660.bin personally recommended due to its enhanced compatibility made post-release of the PSX specifically for the PSP and PS3's PS1 emulation. I have yet to have a game that's problems aren't fixed somewhat by using this instead of the normal scph BIOS files.
2 - Likely not needed on MinUI for multiple reasons. One being that the stock BIOS file is still in it's original location on the internal storage of your device and two being that picogpsp can also use a emulated BIOS. Some games that are prone to having issues such as Final Fantasy 6 may benefit from having an actual gba_bios.bin file placed in the right spot on the SD card.
3 - Definitely not necessary, but if you want GameBoy Color boot logos, you can put this on the SD card for them. More a cosmetic thing than a practical one as it seems Gambatte is able to handle pretty much everything with the internal emulated BIOS.
4 - Enhanced options such as setting region on boot and an in-game menu with cheats can be accessed using the Neo Geo UNIBIOS. Download the linked archive and extract the uni-bios.rom file to your PC. Open up your already (legally) obtained NEOGEO.zip without extracting (using a program like 7Zip or WinRAR) and add the uni-bios.rom file to the archive. You can set the "system" for GnGeo to "Unibios" by adding a line to the file called gngeorc under /Roms/NEOGEO/.gngeo for MinUI or /Apps/GnGeo for GmenuNX saying system unibios If you are missing the gngeorc file you can either create an empty text file yourself or download a pre-made one from here.
MinUI and GmenuNX use the same emulator for GB/GBC called "Gambatte". This emulator allows you to do a few things to customize the look of games. Normal GameBoy games can be colorized or use a different palette than the default pea-green that represents the original GameBoy. Both GameBoy and GameBoy Color games can use borders as well to fill in the sides of the screen that aren't used when using any scaling option other than full-screen.
Some borders and palettes can be downloaded from this excellent repo by SerjTargarien. Using the both is as simple as putting the folders in the right place -- /Roms/GameBoy/.gambatte for MinUI and /Apps/gambatte for GmenuNX. You can select both borders and palettes by going into the emulator options (advanced options on MinUI).
Thanks to some incredible work from neonloop, a handful of RetroArch cores have been ported to the Trimui! The cores are still a bit of a work in progress, but represent some awesome potential for future systems to show up on the handheld. From neonloop:
- Runs libretro cores on TRIMUI. Supports:
- Arcade (mame2000)
- Game Boy (gambatte)
- Game Boy Advance (gpsp)
- NES (fceumm)
- Super NES (snes9x2002/snes9x2005)
- PCE / TurboGrafx-16 (beetle-pce-fast)
- PlayStation (pcsx_rearmed)
- more to come
- All emus have fast-forward, soft scaling options, menu+button combo keybindings, per-game config, screenshot, most emus have auto-frameskip based on audio buffer
Zip contains MinUI paks and gmenunx shortcuts for each emu. It will overwrite existing emus in MinUI (except "Super Nintendo (2005)", which needs separate ROM dir), so best to back up or copy only Games/picoarch.pak if you want to keep old ones around. In gmenu, will go into separate libretro section. Some don't have icons yet, but you can copy and rename existing icons to match new names. Grab the latest version from neonloop's git here.
Hebinotsubo created a custom dark skin for GnGeo that can be installed by placing the zipped gngeo_data.zip file as-is it under /Emus/NEOGEO.pak for MinUI or /Apps/GnGeo for GmenuNX
Screenshot of how it's supposed to look below. Download available here!

Both MinUI and GmenuNX give you options for connecting to your TrimUI via ADB (Android Debug Bridge). You can issue commands, upload files over USB and manage the contents of your SD card (and NAND, so be careful!) using adb via your Terminal/Command line or through something like the very convenient WebADB. It's worth noting that you may need the ADB driver for your device if it is not already installed. You can install this on Windows by going into Device Manager.
- With your TrimUI connected to your PC via USB, turn on your system and navigate to "Tools".
- Under tools, you will have an entry titled "USB Bridge". Select it.
- You should be greeted with a menu saying "Bridge is not running". Press "A" to start the USB bridge.
- We'll be using WebADB for this example. Open WebADB and locate "Available Devices" on the left-hand side of the screen.
- Your device should populate here. Select it and then click "Connect" to... connect.
- From here you should be able to select other options and browse the files of your device. Note that issuing other ADB commands won't work, but traditional Linux commands can be issued via the Terminal Emulator option.
- With your TrimUI connected to your PC via USB, turn on the system and navigate to "Apps".
- Under Apps, you will have an option called "ADB". Select it.
- This will automatically open the connection to receive ADB commands and kick you back to the main menu. This is normal.
- We'll be using WebADB for this example. Open WebADB and locate "Available Devices" on the left-hand side of the screen.
- Your device should populate here. Select it and then click "Connect" to... connect.
- From here you should be able to select other options and browse the files of your device. Note that issuing other ADB commands won't work, but traditional Linux commands can be issued via the Terminal Emulator option.

Due to the TrimUI Model S/PowKiddy A66 lacking a dedicated headphone jack, a USB-C dongle would have to be used to get audio via headphones. It is somewhat unclear what makes a dongle compatible or not, but here are a few that are known to work with the device and both custom launchers.
- Apple USB-C to 3.5mm Headphone Jack Adapter | $9.00 USD
- onn. Auxiliary 3.5mm to USB-C Adapter | ~$5.00 USD
Do note that some reports have mentioned using USB-C for audio can cause stuttering or lag while playing games on both custom launchers and the stock UI.
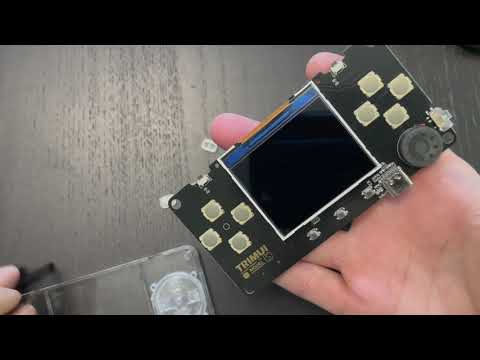
The bright, blue power LED might be a bit irritating to look at over time. MinUI creator shauninman did a video detailing how to dim it just a bit. From the description on YouTube:
What you’ll need:
- T6 screwdriver
- masking tape
- black fine point Sharpie marker
Some tips:
- to avoid stripping the screws you can place a rubber band between the screw and the driver
- to get the board free of the posts just push the D-pad and YXBA buttons through the front plate
- before putting it back together tape the L, R, and SELECT/MENU/START buttons in place on the front plate
- if the screen mask comes loose just place it back in the screen notch on the front plate, thick edge at the top
- the rubber button pads have a flat edge, that edge should be against the outside of the device
- when re-inserting the board, angle the top into the already taped L/R buttons at first but try to lay it flat over the posts or you might have some trouble with clearances on the bottom posts
Good luck, and like I told my 5 year old, it’s pretty easy, just be patient (and don’t force anything) :D
The battery in the TrimUI Model S/PowKiddy A66 is a 3.7v 500mAh 303450 Li-Po (Amazon US | Aliexpress). This can either be replaced with the same battery or upgraded if you are willing to 3D print a replacement back shell for your device to accommodate the additional thickness. Liartes has created this 3D model that can be printed to fit the new battery available via Thingiverse.
Note from Liartes about the 3D print: Some people reported that they can't screw the custom backplate to their devices. I have calibrated the model using my own printer and indeed it may need some clearance. If you experience this, increasing the width of the model in your slicer from 106mm to 107mm should give you a perfect print.
Liartes and a few other Discord users in the #trimui-a66 channel of the Retro Game Handhelds Discord have found that a 1000mAh 523450 Li-Po (Amazon US | Aliexpress) battery will work in the device.
It is recommended to get a battery without any additional connector on it since the battery itself is going to be soldered directly to the PCB of the Trimui itself. The original battery will have to (carefully) be de-soldered, however this isn't too challenging since the contacts are quite large and easy to work with.
Original back plate compared to 3D printed replacement by Liartes
