Oficial firmware for Pocketgo 2
https://github.com/Ninoh-FOX/POCKETGO2_ROGUE_CFW/releases/tag/v1.0.7
https://github.com/Ninoh-FOX/POCKETGO2_ROGUE_CFW/releases/tag/v1.0.6
https://github.com/Ninoh-FOX/POCKETGO2_ROGUE_CFW/releases/tag/v1.0.5
https://github.com/Ninoh-FOX/POCKETGO2_ROGUE_CFW/releases/tag/v1.0.4
https://github.com/Ninoh-FOX/POCKETGO2_ROGUE_CFW/releases/tag/v1.0.3
https://github.com/Ninoh-FOX/POCKETGO2_ROGUE_CFW/releases/tag/v1.0.2
https://github.com/Ninoh-FOX/POCKETGO2_ROGUE_CFW/releases/tag/v1.0.1
-Gmenu2-
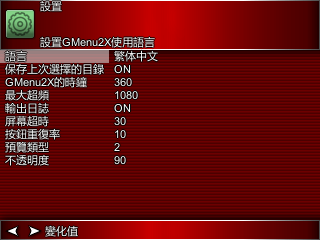
- Update GMENU2x, now it shows the internal language of the game, if it has it, according to the selected language.
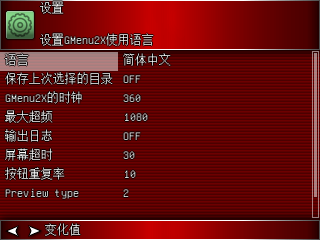
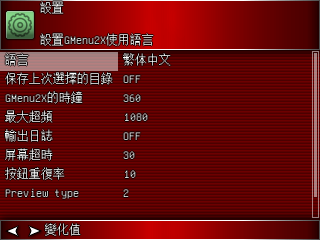
- Add Korean, Japanese and Chinese languages.
- fixed some missing texts.
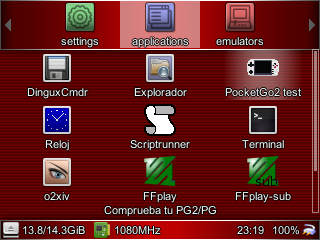
- Optimized themes, now overwrites system icons too.
- Changed multi-language fonts to a much more comfortable one to read.
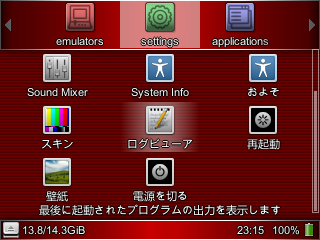
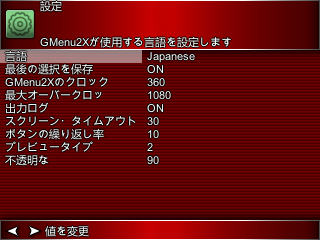
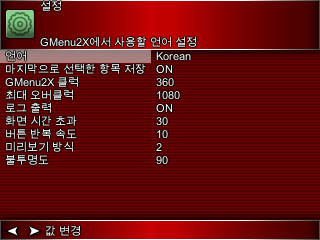
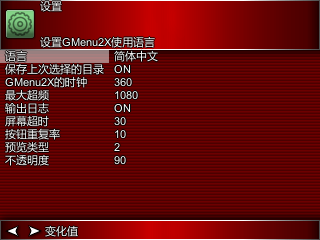
IMPORTANT: You have to delete the file /media/data/.linker so that all the changes are overwritten, otherwise there will be opks that lose the name.
-Sound-
- Now the volume of the headphones is also saved.
- the Master volume control is now accessible from the SOUND MIXER, it is no longer necessary to modify the speaker to lower the volume.
-System-
- Fixed mapping of joystick emulation as dpad in versions 1.0.5 and 1.0.6
- Optimized the clock of the GPU, now it is to the maximum recommended by the chip. (before 360Mhz, now 500Mhz)
- Optimized the USB core, there will be no more random restarts when the console was disconnected from the computer.
- Add the new keys combo for dis/enable the analog stick (POWER+L1), so the keys combos is the follow list:
- POWER = Screen on/off in gmenu2x.
- POWER+A = Change the resolution screen to fullscreen in hardware mode.
- POWER+B = switch analog stick to dpad.
- POWER+X = Screenshot capture.
- POWER+L1 = Dis/enable analog stick
- POWER+R1 = enable mode mouse (stick is cursor, L2&R2 the mouse buttons)
- POWER+VOL+ or VOL- = change the brightness screen
- POWER+UP or DOWN DPAD = change the sharpness
- POOWER+SELECT = kill aplication
- POWER+START = Reboot
You may erase the file /media/data/.linker for that this has effect.
- Update libs in system and kernel.
- Recompilded code with the new toolchain
- Update linux-firmware package
- Update Gmenu2x, now you can config the opacy level in the backgroun preview imagen game.
- Removed inessesaries funtions of the kernel again.
- Fixed R2 not recognition in some motherboards (again)
- Update scripts, now you can format in ext4 and you can do a better backup of the home folder.
- Remove Esoteric from the rootfs, but you can install this from opk.
- Removed inessesaries funtions.
- Fixed and updated SDL2 libraries.
- Insert Scriptrunner app, now you can format the external sdcard in fat32, exfat or ext3 in the console.
- Fixed errors in games that not run.
- Fixed R2 time reactions.
- Recompiled PCSX4ALL
- Fixed Gmenu2x duplicate icons when this is edit
- Fix clock hour reset when poweroff the console.
- Gmenu2x now can show two type of previews (put in /(romsdir)/.previews/).
- ajust the joystick (again).
- Updated the file system, partition and expansion scripts again.
- Gmenu2x analog stick control is removed
- Adjusted the battery.
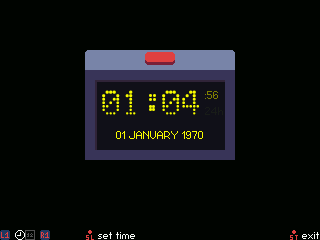
- Update of the Stock Clock application with a new redesign. thanks to Rafa Vico (https://github.com/RafaVico)

- Text editor, corrected opk buttons. thanks to Rafa Vico (https://github.com/RafaVico)
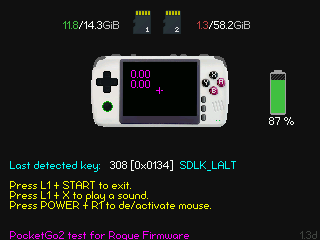
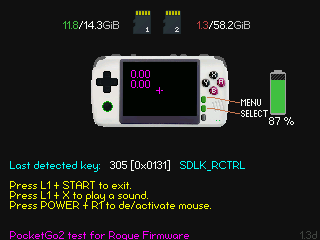
- Added the hardware tester POCKETGO 2. thanks to Rafa Vico (https://github.com/RafaVico)

- Support to read the second sdcard in fat32, exFAT, ntfs, ext4 (recommended) and ext3 format.
NOTE: for that the ext4 sdcard works, you need format this from command lines since the console, if you go to use the pc, then format in ext3.
- Added key combinations with the power button:
- POWER + VOL + or VOL-: Adjust the brightness of the screen.
- POWER + SELECT: Close the current application.
- POWER + START: Restart the console.
- POWER + B: The analog stick will work as DPAD.
- POWER + A: Change the aspect ratio with the screen in Hardware mode.
- POWER + R1: Mouse emulation (Stick is movement and the L2 and R2 buttons the buttons)
- POWER + DPAD up / dowm: Adjust the sharpness.
- POWER + X: Take a screenshot.
-
In Gmenu2x the power button can turn the screen off or on.
-
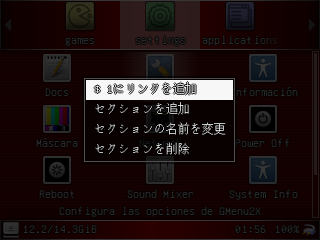
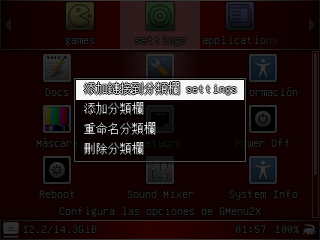
You can change the cpu to maximum or minimum in gmenu2x for the opk, the same to change the name, description, icon and file filter.
For a correct installation, the first time it is advisable to flash the sd_image in an sdcard with Win32DiskImager for example, too you need format the sdcard two times with SD Formatter before of flasher the sdcard.
https://sourceforge.net/projects/win32diskimager/
if W32DI NOT WORK fine, try them https://www.balena.io/etcher/ or you can type in a terminal the follow command:
sudo dd if=sd_image.bin of=/dev/(sdcard_partition)
https://www.sdcard.org/downloads/formatter/
One time that the program finish, put the sd in the console, NOT RESIZE THE PARTITION FROM PC!! The firmware has a script for auto resize!!
You can also use flasher.opk for the same, but it takes much longer and being a console that has the SD1 (TF1) of the system at hand because I do not see it really necessary, even so, it is in the release. If you would like to use it, it is advisable to put it in the apps folder of the SD2 (TF2).
For future updates you will only need to use the update.opk, which is used just like any application launched from GMENU2X. You can use it in both the apps folder of SD1 (TF1) or SD2 (TF2).
First you need a pc or vm with Debian 9.11 64 bits.
$ sudo apt-get update
$ sudo apt-get install bison flex gettext texinfo wget cpio python unzip mercurial subversion libncurses5-dev libc6-dev-i386 bzr squashfs-tools
$ git clone https://github.com/Ninoh-FOX/toolchain.git
$ cd toolchain
$ make rg350_defconfig BR2_EXTERNAL=board/opendingux
$ make
$ . board/opendingux/gcw0/make_upgrade.sh
======================================================
To build and use the buildroot stuff, do the following:
- run 'make menuconfig'
- select the packages you wish to compile
- run 'make'
- wait while it compiles
- Use your shiny new root filesystem. Depending on which sort of root filesystem you selected, you may want to loop mount it, chroot into it, nfs mount it on your target device, burn it to flash, or whatever is appropriate for your target system.
You do not need to be root to build or run buildroot. Have fun!
In order to do an offline-build (not connected to the net), fetch all selected source by issuing a
$ make source
before you disconnect. If your build-host is never connected, then you have to copy buildroot and your toplevel .config to a machine that has an internet-connection and issue "make source" there, then copy the content of your dl/ dir to the build-host.
Buildroot supports building out of tree with a syntax similar to the Linux kernel. To use it, add O= to the make command line, E.G.:
$ make O=/tmp/build
And all the output files (including .config) will be located under /tmp/build.
You can specify a config-file for uClibc:
$ make UCLIBC_CONFIG_FILE=/my/uClibc.config
And you can specify a config-file for busybox:
$ make BUSYBOX_CONFIG_FILE=/my/busybox.config
To use a non-standard host-compiler (if you do not have 'gcc'), make sure that the compiler is in your PATH and that the library paths are setup properly, if your compiler is built dynamically:
$ make HOSTCC=gcc-4.3.orig HOSTCXX=gcc-4.3-mine
Depending on your configuration, there are some targets you can use to use menuconfig of certain packages. This includes:
$ make HOSTCC=gcc-4.3 linux-menuconfig
$ make HOSTCC=gcc-4.3 uclibc-menuconfig
$ make HOSTCC=gcc-4.3 busybox-menuconfig
Please feed suggestions, bug reports, insults, and bribes back to the buildroot mailing list: buildroot@buildroot.org
Download this git Go to kenel folder.
$ make ARCH=mips pocketgo2_defconfig
$ make ARCH=mips vmlinuz.bin -j4
$ make ARCH=mips modules -j4
$ ./create_modules_fs.sh
