This example will set you up for a very common situation: users can # with a magic link and then update their account with public profile information, including a profile image.
This demonstrates how to use:
- User #s using Supabase Auth.
- User avatar images using Supabase Storage.
- Public profiles restricted with Policies.
- Frontend using Next.js.
- Frontend:
- Next.js - a React framework for production.
- Supabase.js for user management and realtime data syncing.
- Backend:
- app.supabase.io: hosted Postgres database with restful API for usage with Supabase.js.
The Vercel deployment will guide you through creating a Supabase account and project. After installation of the Supabase integration, all relevant environment variables will be set up so that the project is usable immediately after deployment 🚀.
# to Supabase - https://app.supabase.io and create a new project. Wait for your database to start.
Once your database has started, run the "User Management Starter" quickstart. Inside of your project, enter the SQL editor tab and scroll down until you see User Management Starter: Set up a Public Profiles table which you can access with your API.
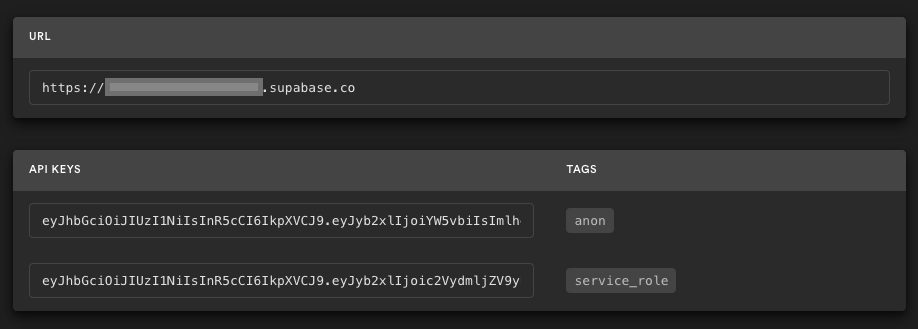
Go to the Project Settings (the cog icon), open the API tab, and find your API URL and anon key, you'll need these in the next step.
The anon key is your client-side API key. It allows "anonymous access" to your database, until the user has logged in. Once they have logged in, the keys will switch to the user's own login token. This enables row level security for your data. Read more about this below.
NOTE: The service_role key has full access to your data, bypassing any security policies. These keys have to be kept secret and are meant to be used in server environments and never on a client or browser.
Create a file in this folder .env.local
NEXT_PUBLIC_SUPABASE_URL=
NEXT_PUBLIC_SUPABASE_ANON_KEY=
Populate this file with your URL and Key.
Run the application: npm run dev. Open your browser to https://localhost:3000/ and you are ready to go 🚀.
This project uses very high-level Authorization using Postgres' Role Level Security.
When you start a Postgres database on Supabase, we populate it with an auth schema, and some helper functions.
When a user logs in, they are issued a JWT with the role authenticated and their UUID.
We can use these details to provide fine-grained control over what each user can and cannot do.
This is a trimmed-down schema, with the policies:
-- Create a table for Public Profiles
create table profiles (
  id uuid references auth.users not null,
  updated_at timestamp with time zone,
  username text unique,
  avatar_url text,
  website text,

  primary key (id),
  unique(username),
  constraint username_length check (char_length(username) >= 3)
);

alter table profiles enable row level security;

create policy "Public profiles are viewable by everyone."
  on profiles for select
  using ( true );

create policy "Users can insert their own profile."
  on profiles for insert
  with check ( auth.uid() = id );

create policy "Users can update own profile."
  on profiles for update
  using ( auth.uid() = id );

-- Set up Realtime!
begin;
  drop publication if exists supabase_realtime;
  create publication supabase_realtime;
commit;
alter publication supabase_realtime add table profiles;

-- Set up Storage!
insert into storage.buckets (id, name)
values ('avatars', 'avatars');

create policy "Avatar images are publicly accessible."
  on storage.objects for select
  using ( bucket_id = 'avatars' );

create policy "Anyone can upload an avatar."
  on storage.objects for insert
with check ( bucket_id = 'avatars' );Supabase is open source. We'd love for you to follow along and get involved at https://github.com/supabase/supabase
