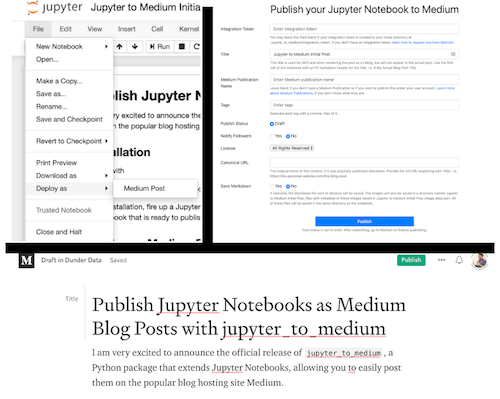
Publish Jupyter Notebooks as Medium blog posts directly from your notebook with the help of jupyter_to_medium.
Do you ....
- Publish blog posts on Medium?
- Use Jupyter Notebooks to write your posts?
- Dislike the time and effort it takes to transfer your posts from Jupyter to Medium?
- Get lost/bored when switching between the medium editor, gist etc to create well linted code?
- Want to integrate LaTeX into your posts without manually screenshot-ing all your equation cells?
If so, jupyter_to_medium will automate the process of taking your Jupyter Notebook, as is, and publishing it as a Medium post in almost no time at all saving huge amounts of time.
I've published dozens of blog posts on Medium myself with all of them beginning as Jupyter Notebooks. Manually converting them to Medium posts was a fairly lengthy, painstaking process. One particularly painful process was inserting tables, which Medium does not support, into my posts. Nearly all of my posts contain numerous pandas DataFrames (such as this one, which has 40! DataFrames) which are represented as HTML tables within a notebook. I'd take screenshots of each one to insert them into my Medium posts.
pip install jupyter_to_medium
You should be able to skip the next step, but if the extension is not showing up in your notebook, run the following command:
jupyter bundlerextension enable --py jupyter_to_medium._bundler --sys-prefix
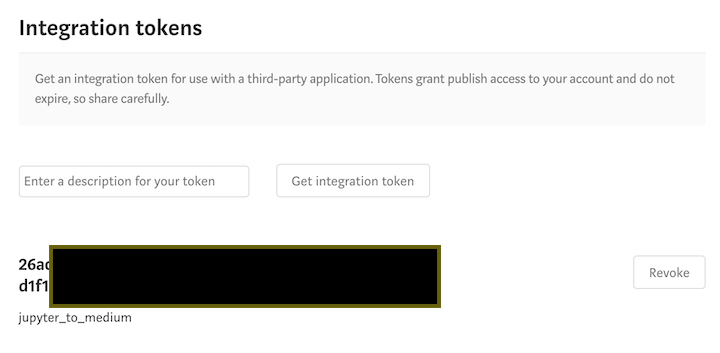
Before using this package, you must request an integration token from Medium by emailing them at yourfriends@medium.com allowing you to create a token in your Medium settings. You can read the entire instructions on how to get your integration token.
Once your request to create integration tokens is accepted, navigate to your Medium settings. In the 'Secuity & Apps' section at the bottom you'll see 'Integration tokens'. Enter a description for the token (jupyter_to_medium is a good choice) and then create the token.
Once you have your integration token, create the folder and file .jupyter_to_medium/integration_token in your home directory and save the token there. If you don't save it, you'll need to access it every time you wish to make a new post.
When publishing, jtm can take unformatted code snippets and replace them with linted gists. In order to do this, it needs to create the gists which requires github access as well as a Personal Access Token (PAT). To create a github account, # here and then follow these instructions to create a PAT - ensure to select the option for creating gists.
Once you have your Github PAT, similar to the integration token, create the folder and file .jupyter_to_medium/github_token in your home directory and save the token there. If you don't save it, you'll need to access it every time you wish to make a new post.
There are three ways to publish notebooks:
- Within an active notebook
- From the command line
- Using a Python script
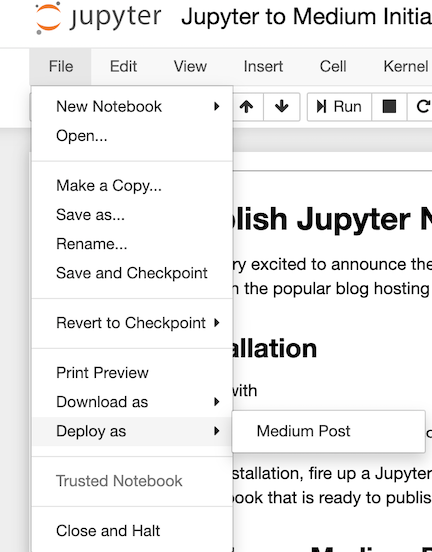
After installation, open the notebook you wish to publish and select the option File -> Deploy as -> Medium Post
A new browser tab will open with a short form that needs to be completed.
After clicking publish, the notebook and all images will be uploaded to Medium. Any HTML tables (such as pandas DataFrames) will be converted to images (via chrome), as Medium has no ability to represent tables. This is a time consuming process, so be prepared to wait. Check your terminal for updates. If successful, you'll get the following response with a link to view the post.
Click the link to view the post.
Currently, your post will be published as a draft. Review and publish the post on Medium.
Upon installation, you'll have access to the command line program jupyter_to_medium with the same options as the below function.
jupyter_to_medium --pub-name="Dunder Data" --tags="python, data science" "My Awesome Blog Post.ipynb"In a separate script/notebook, import juptyer_to_medium as a module. Pass the publish function the location of the Jupyter Notebook you would like to publish as a Medium blog post.
import jupyter_to_medium as jtm
jtm.publish('My Awesome Jupyter Notebook.ipynb',
            integration_token=None,
            pub_name=None,
            title=None,
            tags=None,
            publish_status='draft',
            notify_followers=False,
            license='all-rights-reserved',
            canonical_url=None,
            chrome_path=None,
            save_markdown=False,
            table_conversion='chrome',
            gistify=False,
            gist_threshold=5,
            public_gists=True
            )
If successful, a message will be printed with the URL to your post. Additionally, JSON data will be returned as a dictionary containing the returned request from Medium.
Currently, this package only works for the "classic" Jupyter Notebook and is not available in Jupyter Lab. If you have experience making Jupyter Lab extensions, please let me know.
If your post is unsuccessful, a message with the error will be printed to the screen with information that might help you solve the issue.
By default, tables will be converted via Chrome web browser by taking screenshots of them. If you don't have Chrome installed or cannot get chrome to work, select 'matplotlib' for the table conversion.


