-
Notifications
You must be signed in to change notification settings - Fork 171
v1.1 BOM
Revar Desmera edited this page Apr 18, 2017
·
3 revisions
You will need the following tools to assemble this printer.
| Qty | Description |
|---|---|
| 1 | Multimeter for checking wiring. |
| 1 | Soldering iron. |
| 1 | Small rubber mallet to help convince some parts to join. |
| 1 | Mineral oil for lubrication. |
| 1 | Fine grit sandpaper to clean up the rails. |
| 1 | Optional cyanoacrylate glue. (super-glue) |
You'll need controller electronics to drive the Snappy. Here's what I recommend. Prices given are based on what I found on Amazon with a cursory search. All parts found had free shipping options. All costs are in US Dollars.
| Qty | Description | Total Cost | Where Found |
|---|---|---|---|
| 1 | Power Supply, 120W. (300W w/ Heated Bed) | ~$18 | Amazon.com |
| 1 | Controller electronics. (RAMPS1.4+2560+Pololus) | ~$30 | Amazon.com |
| 3 | Mechanical microswitch end-stops and wiring. | ~$ 8 | Amazon.com |
| 5 | NEMA17 Stepper Motors, 40mm length, 1m cable | ~$58 | Amazon.com |
| 1 | J-Head Extruder hot end w/heater, thermistor. | ~$32 | Amazon.com |
| 2 | 40mm 12v 0.15A 2-pin cooling fan, 10mm thick. | ~$15 | Amazon.com |
| 1m | Wire, dual conductor, 22 gauge, stranded | ~$ 1 | Amazon.com |
| 1 | Heated Build Platform. (optional) | ~$19 | Amazon.com |
You'll need the following Hardware to build the cartesian frame:
| Qty | Description | Total Cost | Where Found |
|---|---|---|---|
| 2.4Kg | Plastic Filament. (@ $30/Kg) | ~$72 | MatterHackers.com |
| 2 | ACME threaded rod, 3/8"-8 x 12" | ~$18 | McMaster.com |
| 1 | Extruder Drive Gear | ~$ 3 | Amazon.com |
| 1 | 686 bearing. | ~$ 3 | Amazon.com |
| 1 | Borosilicate glass build platform. (213x200mm) | ~$12 | Amazon.com |
| 4 | Mini binder clips. | ~$ 3 | Amazon.com |
Not counting shipping costs, time, and labor.
- ~$292 without Heated Bed.
- ~$310 with Heated Bed.
All parts should be printable inside a 150mm x 135mm x 110mm build volume. The sled end-cap part, which is longer than 150mm, can be printed diagonally.
Recommended slicer settings:
- 3 perimeters layers
- 3 top and bottom layers
- 0.3 or smaller layer height
- 20% or better infill
- grid/rectangular infill
- No support necessary
- No Raft or brim necessary
You will need to print out the following parts:
| Qty | Name | Image |
|---|---|---|
| 1 | Slop Calibrator (download) |  |
| 2 | Rail X-Y Motor Segment (download) |  |
| 1 | Drive Gears (download) |  |
| 4 | Motor Mount Plates (download) |  |
| 10 | Rail Segment (download) |  |
| 4 | X-Y Slider Sled (download) | 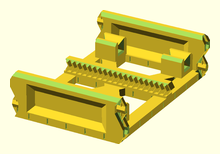 |
| 2 | X-Y Joiner (download) |  |
| 2 | Sled Endcap (download) |  |
| 1 | Platform Supports (download) |  |
| 2 | Rail Y Endcap (download) |  |
| 2 | Y-Z Bottom Joiner (download) |  |
| 4 | Support Legs (download) | 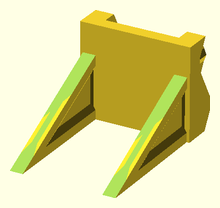 |
| 2 | Rail Z Motor Segment (download) | 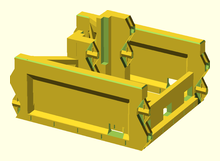 |
| 2 | Lifter Rod Coupler (download) | 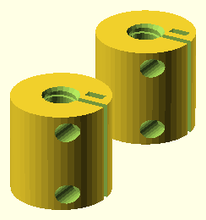 |
| 2 | Lifter Lock Nut (download) |  |
| 2 | Z Slider Sled (download) |  |
| 1 | J-Head Extruder Platform (download) |  |
| 1 | Extruder Motor Clip (download) | 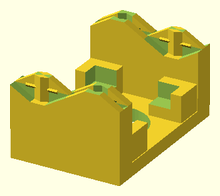 |
| 1 | Extruder Idler & Latch (download) |  |
| 1 | Extruder Fan Shroud (download) |  |
| 1 | Extruder Fan Clip (download) |  |
| 1 | Cooling Fan Shroud (download) |  |
| 1 | Rail Z Endcap (download) | 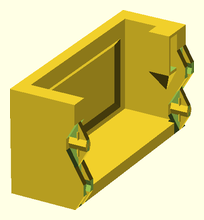 |
| 1 | Spool Holder (download) |  |
| 2 | Cable Chain Links (download) |  |
| 1 | Cable-Chain Mounts (download) |  |
And one of the following motherboard mounts, depending on which electronics you use:
| Qty | Name | Image |
|---|---|---|
| 1 | RAMPS MotherBoard Mount (download) | 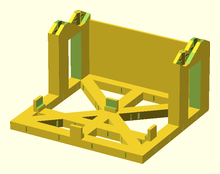 |
| 1 | RAMBo MotherBoard Mount (download) |  |
So, overall, about 160+ hours of printing.