-
Notifications
You must be signed in to change notification settings - Fork 39
Appium Mac Installation
Sai Krishna edited this page Sep 11, 2024
·
21 revisions
- Install Xcode.
- Goto the Mac Appstore and search for Xcode and click the Get button.
- After installation, install the Commandline Tools.
- Open a terminal and run
xcode-select --install
Install Homebrew
- Open a terminal and run
/usr/bin/ruby -e "$(curl -fsSL https://raw.githubusercontent.com/Homebrew/install/master/install)" - Test install by running $ brew --version. You should see something like Homebrew 1.4.1
JAVA Installation
-
Open a terminal and check java version:
java -versionIf the version is less than 1.8 or the command is not recognized you need to install java. -
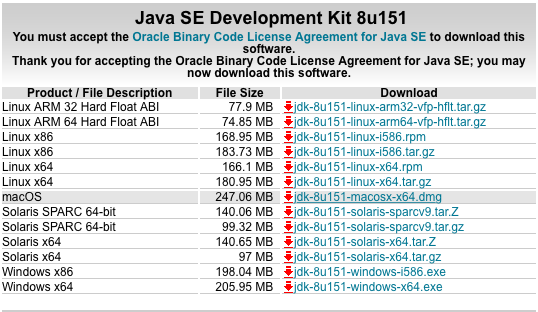
Download jdk-8u151-macosx-x64.dmg JDK

- Open Downloads folder and double click the DMG file.
- Double click the JDK 8 install icon.
- Click the Continue button.
- Click the Install button.
Install Node
- Open a terminal and run
brew install node@20 - Test install by running
npm --version. Verify version10.X.Xor greater is returned. - Test Node is installed by running $ node -v. Verify version
20.X.Xor greater is returned.
Install Android Studio
- Click here to download.
- Drag and drop the Android Studio icon over to Applications folder. Close the install dialog.

- Open Finder and goto Applications folder. Double click Android Studio. Select "I do not have a previous version of studio or I do not want to import my settings" and click OK button.
- Click Next.
- Select Standard Installation and click the Next button.

- Click on Finish button.
 Make note of the SDK Folder path, will help in setting to ANDROID_HOME into environment variables later.
 - Select Start a new Android Studio Project. Continue with default selections and Click on Finish

- Click on Install missing platform(s) and sync project

- Click on Install Build Tools 26.X.X and Sync project

- Click Accept

- Wait for Download to complete and then click on Finish

- Click AVD Manager from Tools | Android | AVD Manager
- Click Create Virtual Device

- Select Nexus 6 and click Next

- Click Download link next to Nougat 7.1.1
- Once Download is completed, select Nougat, Click Next and Finish

- Click on Play Button to launch the Emulator

- Open command prompt or terminal and type
npm install -g appium@nextto install Appium 2.0 server globally. Refer here for more details. - Wait for the installation to be completed successfully
- Check whether Appium is installed properly from command prompt through
appium --versioncommand.
- Install Appium Doctor through the terminal like
npm install -g appium-doctor - Once installation is successful, run
appium-doctor --androidto check the health of android appium setup. If everything is GREEN then we are good to start.
- Download and Install Appium Inspector from here
Add Environment Variables
- Determine which shell you use. Open a terminal and run
$ echo $SHELL. - Based on your shell, you need to edit your profile. e.g.
$ vi ~/.bash_profile or ~/.profile or ~/.zshrc. - Add the following variables.
- export ANDROID_HOME=/Users/YourUser/Library/Android/sdk
- export JAVA_HOME=/Library/Java/JavaVirtualMachines/jdk1.8.0_111.jdk/Contents/Home
- Add the Android sdk paths to your existing PATH=$PATH variable. e.g. :/Users/YourUser/Library/Android/sdk/tools:/Users/YourUser/Library/Android/sdk/platform-tools:/Users/YourUser/Library/Android/sdk/build-tools:
- Save profile. Press shift + : type wq! and press enter.
- Force close/quit all your terminal windows and open a new one.
- Please install Community Edition of
Intellij IDEAfrom here