-
Notifications
You must be signed in to change notification settings - Fork 4
Basic Item Configuration
See also Clothing Item Configuration
All of the texts displayed in the game are localized in one way or another.
In the configuration of an item only the localization keys are supplied and those keys are replaced with the actual text matching the selected language of the user.
Localized texts are provided as a CSV file, with languages as columns and keys/texts as rows.
The order of the languages is not important and the AssetLoader will automatically assign the texts to the languages available in-game.
If the user uses a language not provided in the localization of the mod, those texts will be displayed in English (which is considered to be the default language).
Localization keys without any assigned text will rendered as the key itself.
It's a good idea to quote all texts, even if it isn't necessary in all cases.
The localization file must be called Localization.csv!
Example:
Key, English, German
GAMEPLAY_RubberDuck, "Rubber Duck", "Quietscheente","
GAMEPLAY_RubberDuckDescription, "A little rubber duckie.", "Ein kleines Quietscheentchen."
GAMEPLAY_Squeeze, "Squeeze", "Drücken"
If a localization key is used more than once, only the "last one" will win as they replace each other.
This can also be used to redefine pre-existing localization keys in the vanilla game.
The inventory icon is a Default 2D texture and should be 512x512 pixels in size.
The background of that texture should be transparent.
Since this is purely a UI texture, mip maps can be disabled (saving space) and Wrap Mode and Filter Mode are irrelevant.
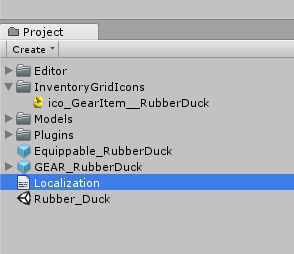
The inventory icon is located by convention.
The path to the texture is produced by taking the item's name and replacing "GEAR_" with "/InventoryGridIcons/ico_GearItem__" (two underscores!).
So the item "GEAR_RubberDuck" must have its inventory icon texture at "/InventoryGridIcons/ico_GearItem__RubberDuck".
Since the lookup is purely by convention, this can also be used to override pre-existing inventory icons by simply providing icons with matching paths.
"Inspect Mode" happens when the user picks up an item.
The item will be shown in the center of the screen, allowing to user to "inspect" it and its properties.
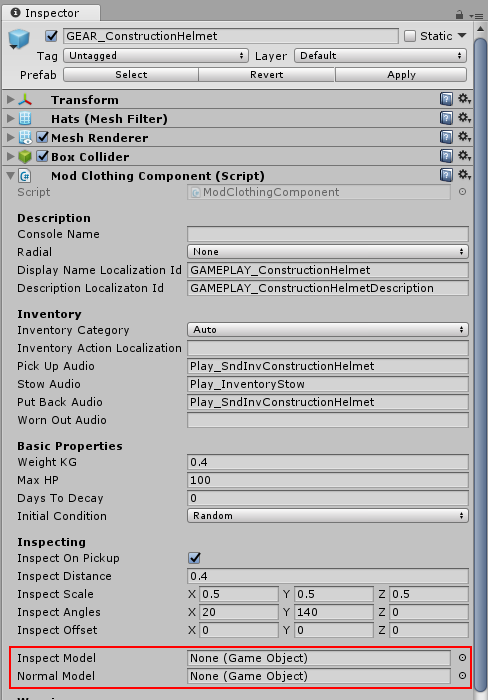
The default way is to always show the same model for the same item.
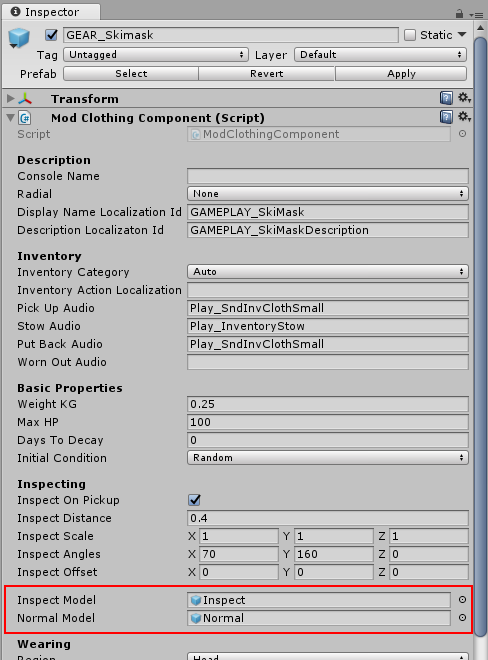
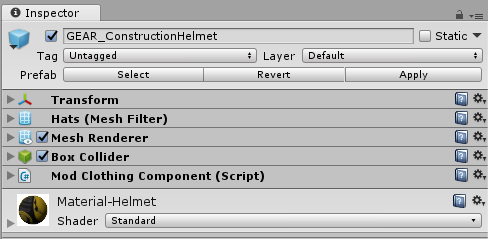
In this case Inspect Model and Normal Model are left empty and the item carries the Renderer and Collider.
It is possible to show a different model during inspect.
In order to do this, the item itself must not carry a Renderer or Collider directly.
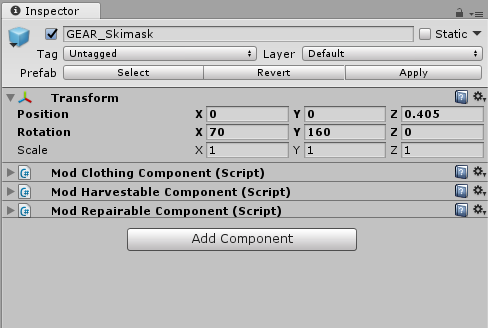
Instead add one child with a Renderer for the "Inspect Mode Model" and another child with a Renderer and Collider for the "Normal Mode Model".
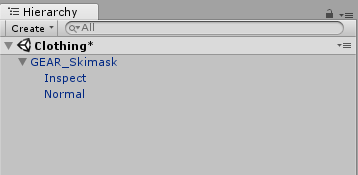
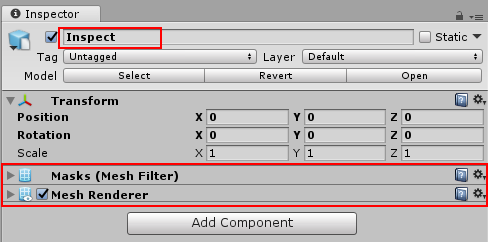
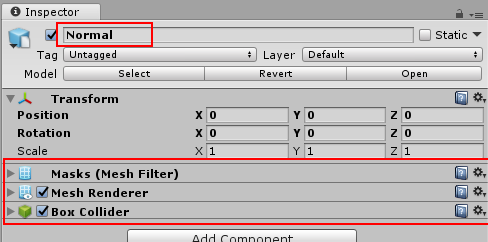
Then drag those children to the Inspect Mode Model and Normal Mode Model respectively.
