-
-
Notifications
You must be signed in to change notification settings - Fork 22
Belt Installation Y Axis
undoz edited this page Sep 2, 2024
·
19 revisions
Belt Clamp
| Type | Item | Quantity |
|---|---|---|
| Hex Nut | M3 | 2 |
| Screw Button Head | M3 8mm | 2 |
Belt Tensioner
| Type | Item | Quantity |
|---|---|---|
| Hex Nut | M3 | 4 |
| Screw Button Head | M3 12mm | 2 |
| Screw Countersunk | M3 10mm | 2 |
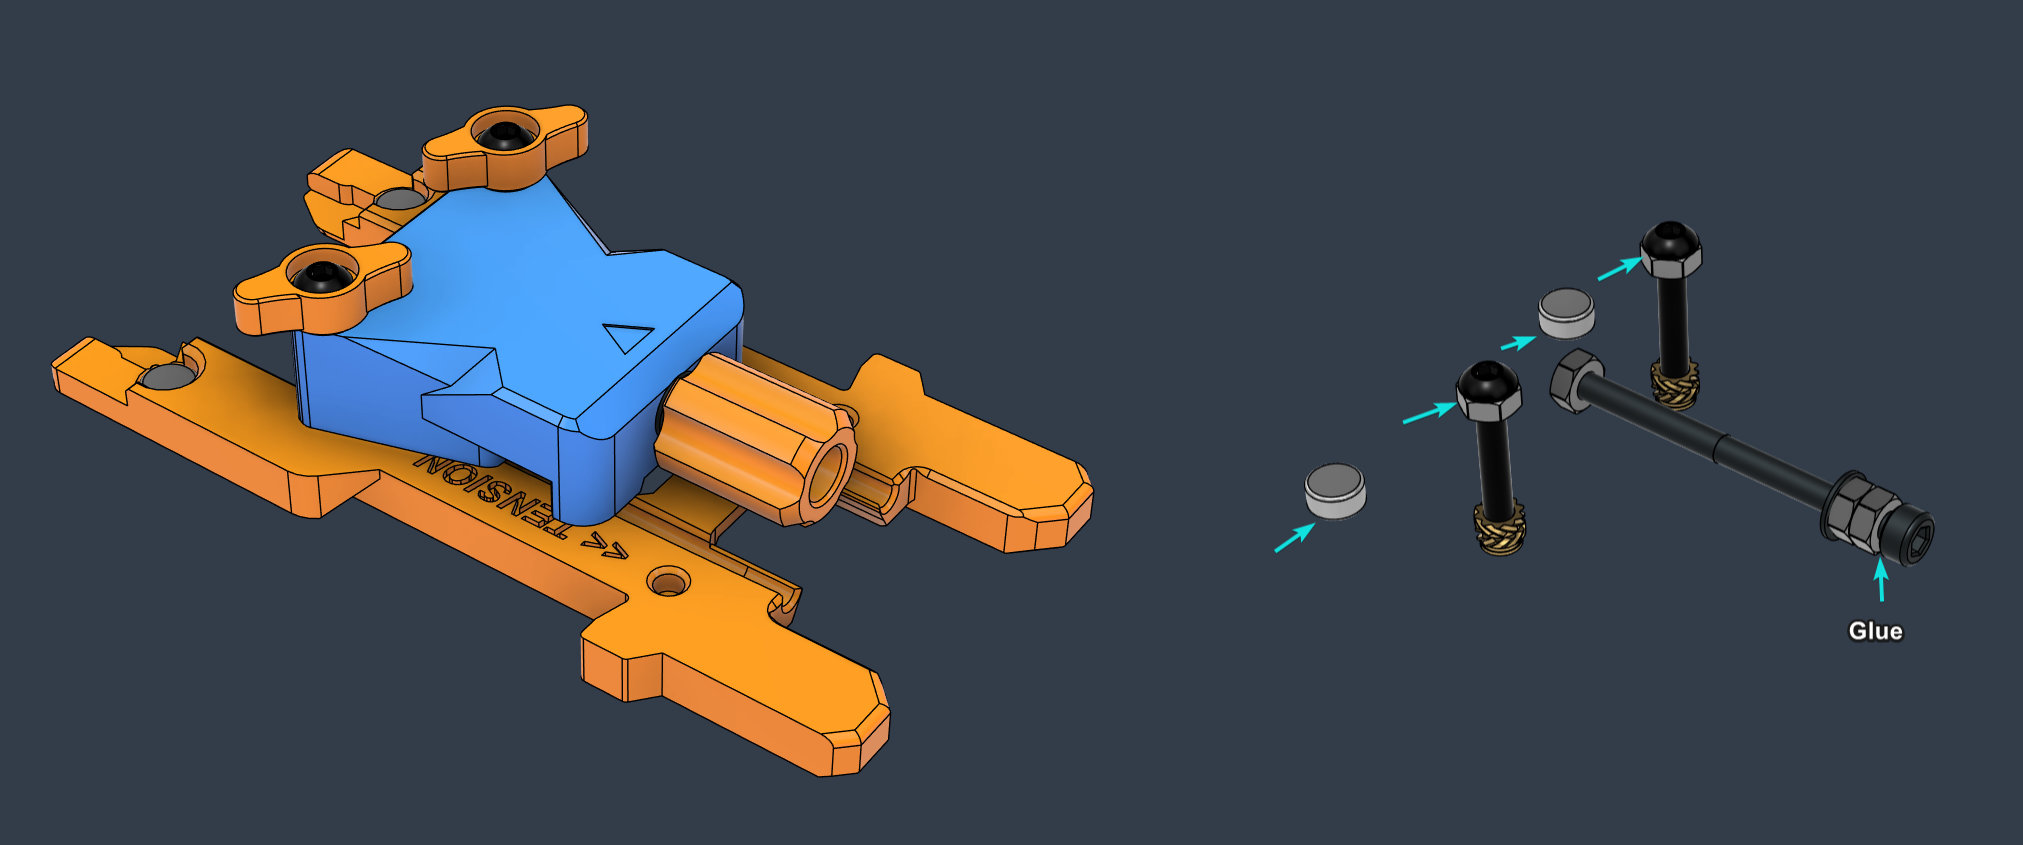
- Glue the hex nuts into the sockets of the belt clamp (Left) to prevent them from falling during installation
- Don't worry if the bottom part cracks or breaks. It is not structural, and only meant for ease of assembly
- Attach a screw to the hex nut and push it inside the tensioner (right). Some force might be needed.

Tip
-
The rear belt clamp can be installed before mounting the carriage onto the mounts
-
To pull the belt though the carriage hole once the carriage is installed, you can insert a narrow piece of tape though the carriage hole and then tape it on both sides of the belt to pull it though.
Pull the belt though.

Y Belt Tool - For Setup and Tightening
- One side helps with pre-tensioning the belt and securing the nuts in place for attaching the top tensioning plate
- The other side is helps aligning the hex key for tensioning the belt with the bed mounted
Hardware
| Item | Quantity |
|---|---|
| Heat Insert M3 Short 5x4 | 2 |
| Nut Hex M3 | 7 |
| Magnet 6x3mm | 2 |
| Screw Button Head M3 20mm | 2 |
| Screw Socket Head M3 40mm | 1 |

- Loosen the grub screws of the front Y stepper motor pulley
- Insert the hex nuts into the tensioning tool and set it in possible
- If it's blocked by the carriage, lift the front of the carriage a bit until it clears it
y_belt_a1.mp4
- Pull the belt tight and hold it with one finger on the carriage
- Set the belt onto the tool and loop it though the hole and under the edge of the carriage
- While holding it, attach the top part of the pre-tensioning tool and lock it in place.
- Rotate the tensioning knob until the belt is tight
y_belt_a2.mp4
- Insert the adjustable belt clamp (make sure the screws are flush with hex nuts)
- Secure the top plate
y_belt_a3.mp4
- Remove the tensioning tool
- Move the carriage back and adjust the belt tension by using the two screws in adjustable clamp
- Note: You don't have to use the tensioning like I do in the video. That side of the tool is mainly intended for tensioning with the bet attached.
y_belt_a4.mp4
- Finish by performing a step sync procedure and secure the grub screws of the front pulley.
Tip
- A piece of Kapton tape can be added on top of the tensioner block to ease the movement and apply more pressure.
- A strip of PVC tape can be added on the CF carriage where the back of the belt touches to increase pressure and friction.

- Due to the heat proximity of the assembly, it is highly recommended to replace the printed top tensioner plate with a ~1.5mm drilled PCB (FR4) plate, or aluminum. Make sure the screws have enough clearance from the heater, not to damage it and cause a short.

A custom FR4 PCB Plate design can be found in User_Mods: Y Tensioner PCB Retailer Plate

- Please refer to the Tuning Guide for setting the belt tension and stepper sync.